Speechify Studio Review and Tutorial (AI Avatars, AI Text to Video, and More)
Speechify Studio is one of the core offerings of Speechify, alongside Speechify Text to Speech and Speechify Audiobooks.
This guide only focuses on Speechify Studio capabilities: AI voice, AI text-to-video, voice cloning, AI avatars, and more.
SPEECHIFY STUDIO REVIEW SUMMARY
Speechify Studio provides AI voice, video, and dubbing tools – realistic voices and smooth avatars. A time/cost saver for content creators. Free plan available. For frequent producers, it’s a compelling suite despite minor quirks.
Free plan, paid plan starts at $69/month ($24/month on annual billing)
What is Speechify Studio?
Speechify Studio is a comprehensive suite of voice and video generative AI tools for creators.
It includes the following features:
Unlike Speechify's text-to-speech, which is available on almost all platforms, Speechify Studio currently only runs on the web.
It's free to get started with, with a limited forever free plan and two paid plan options (more on that in the pricing section later).
NOTE: You can use the same account to access both TTS and Studio. However, you will need different subscription plans to access each one at its full capabilities.
Getting Started With Speechify Studio (Ease of Use)
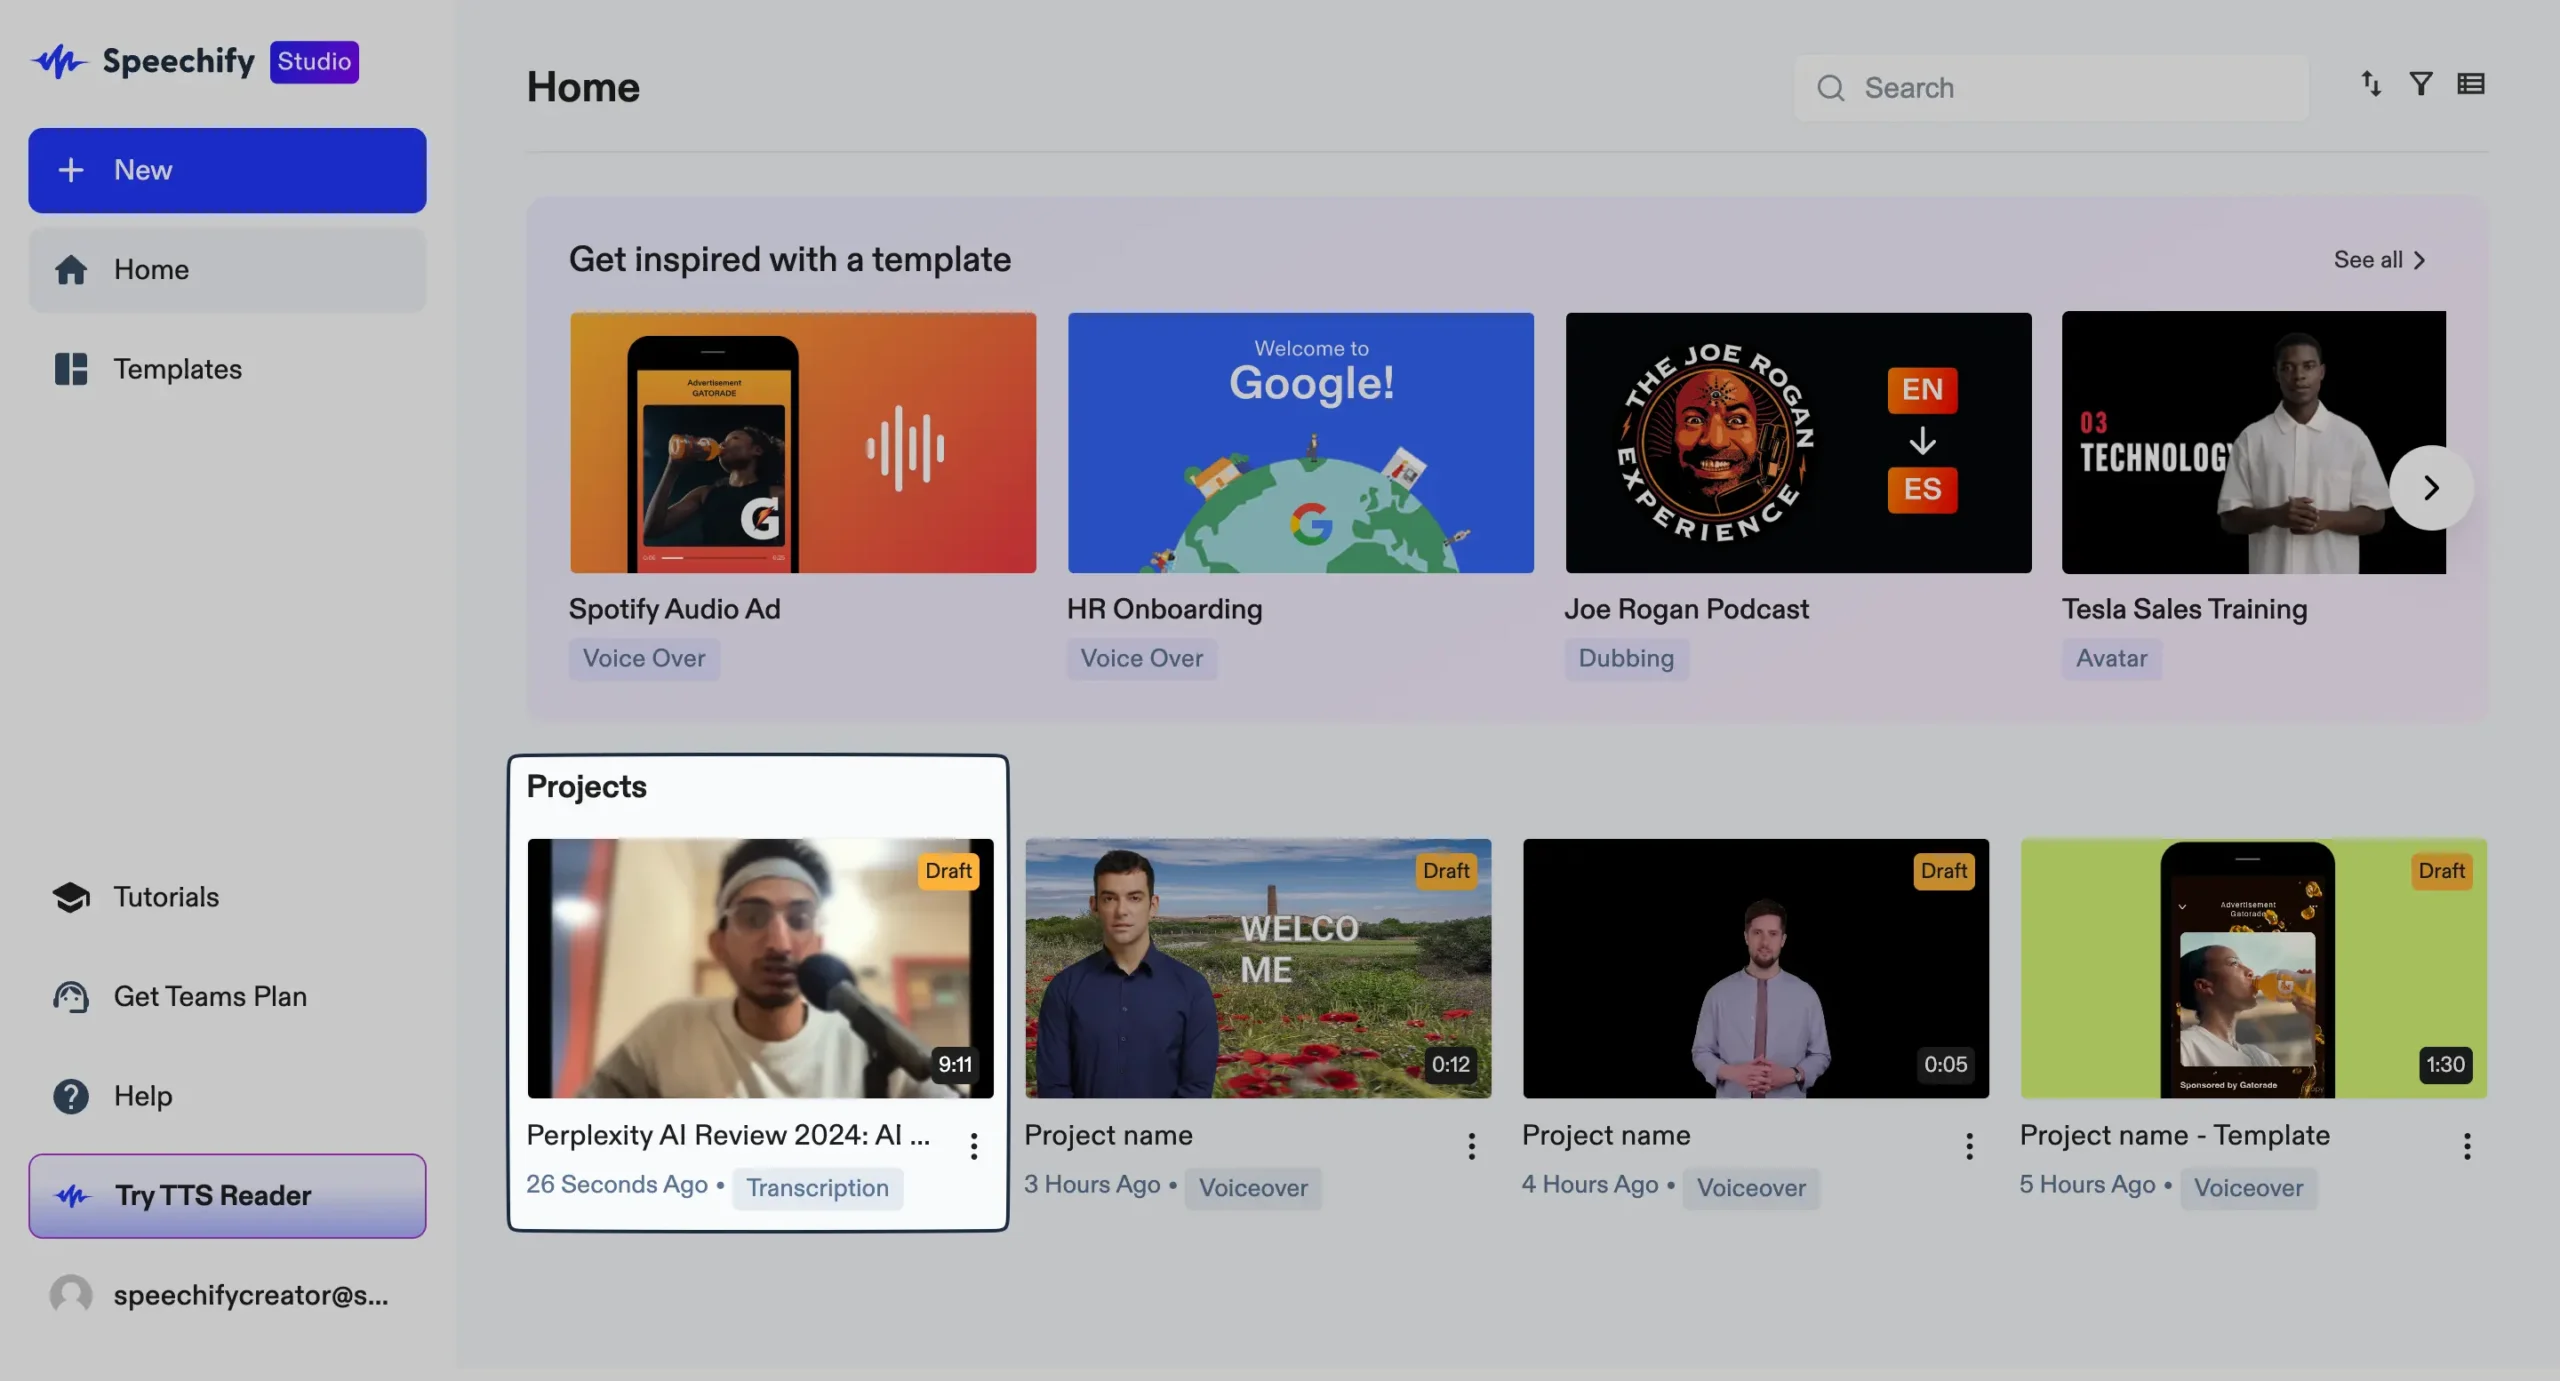
After signing up, Speechify Studio's main dashboard looks like this:
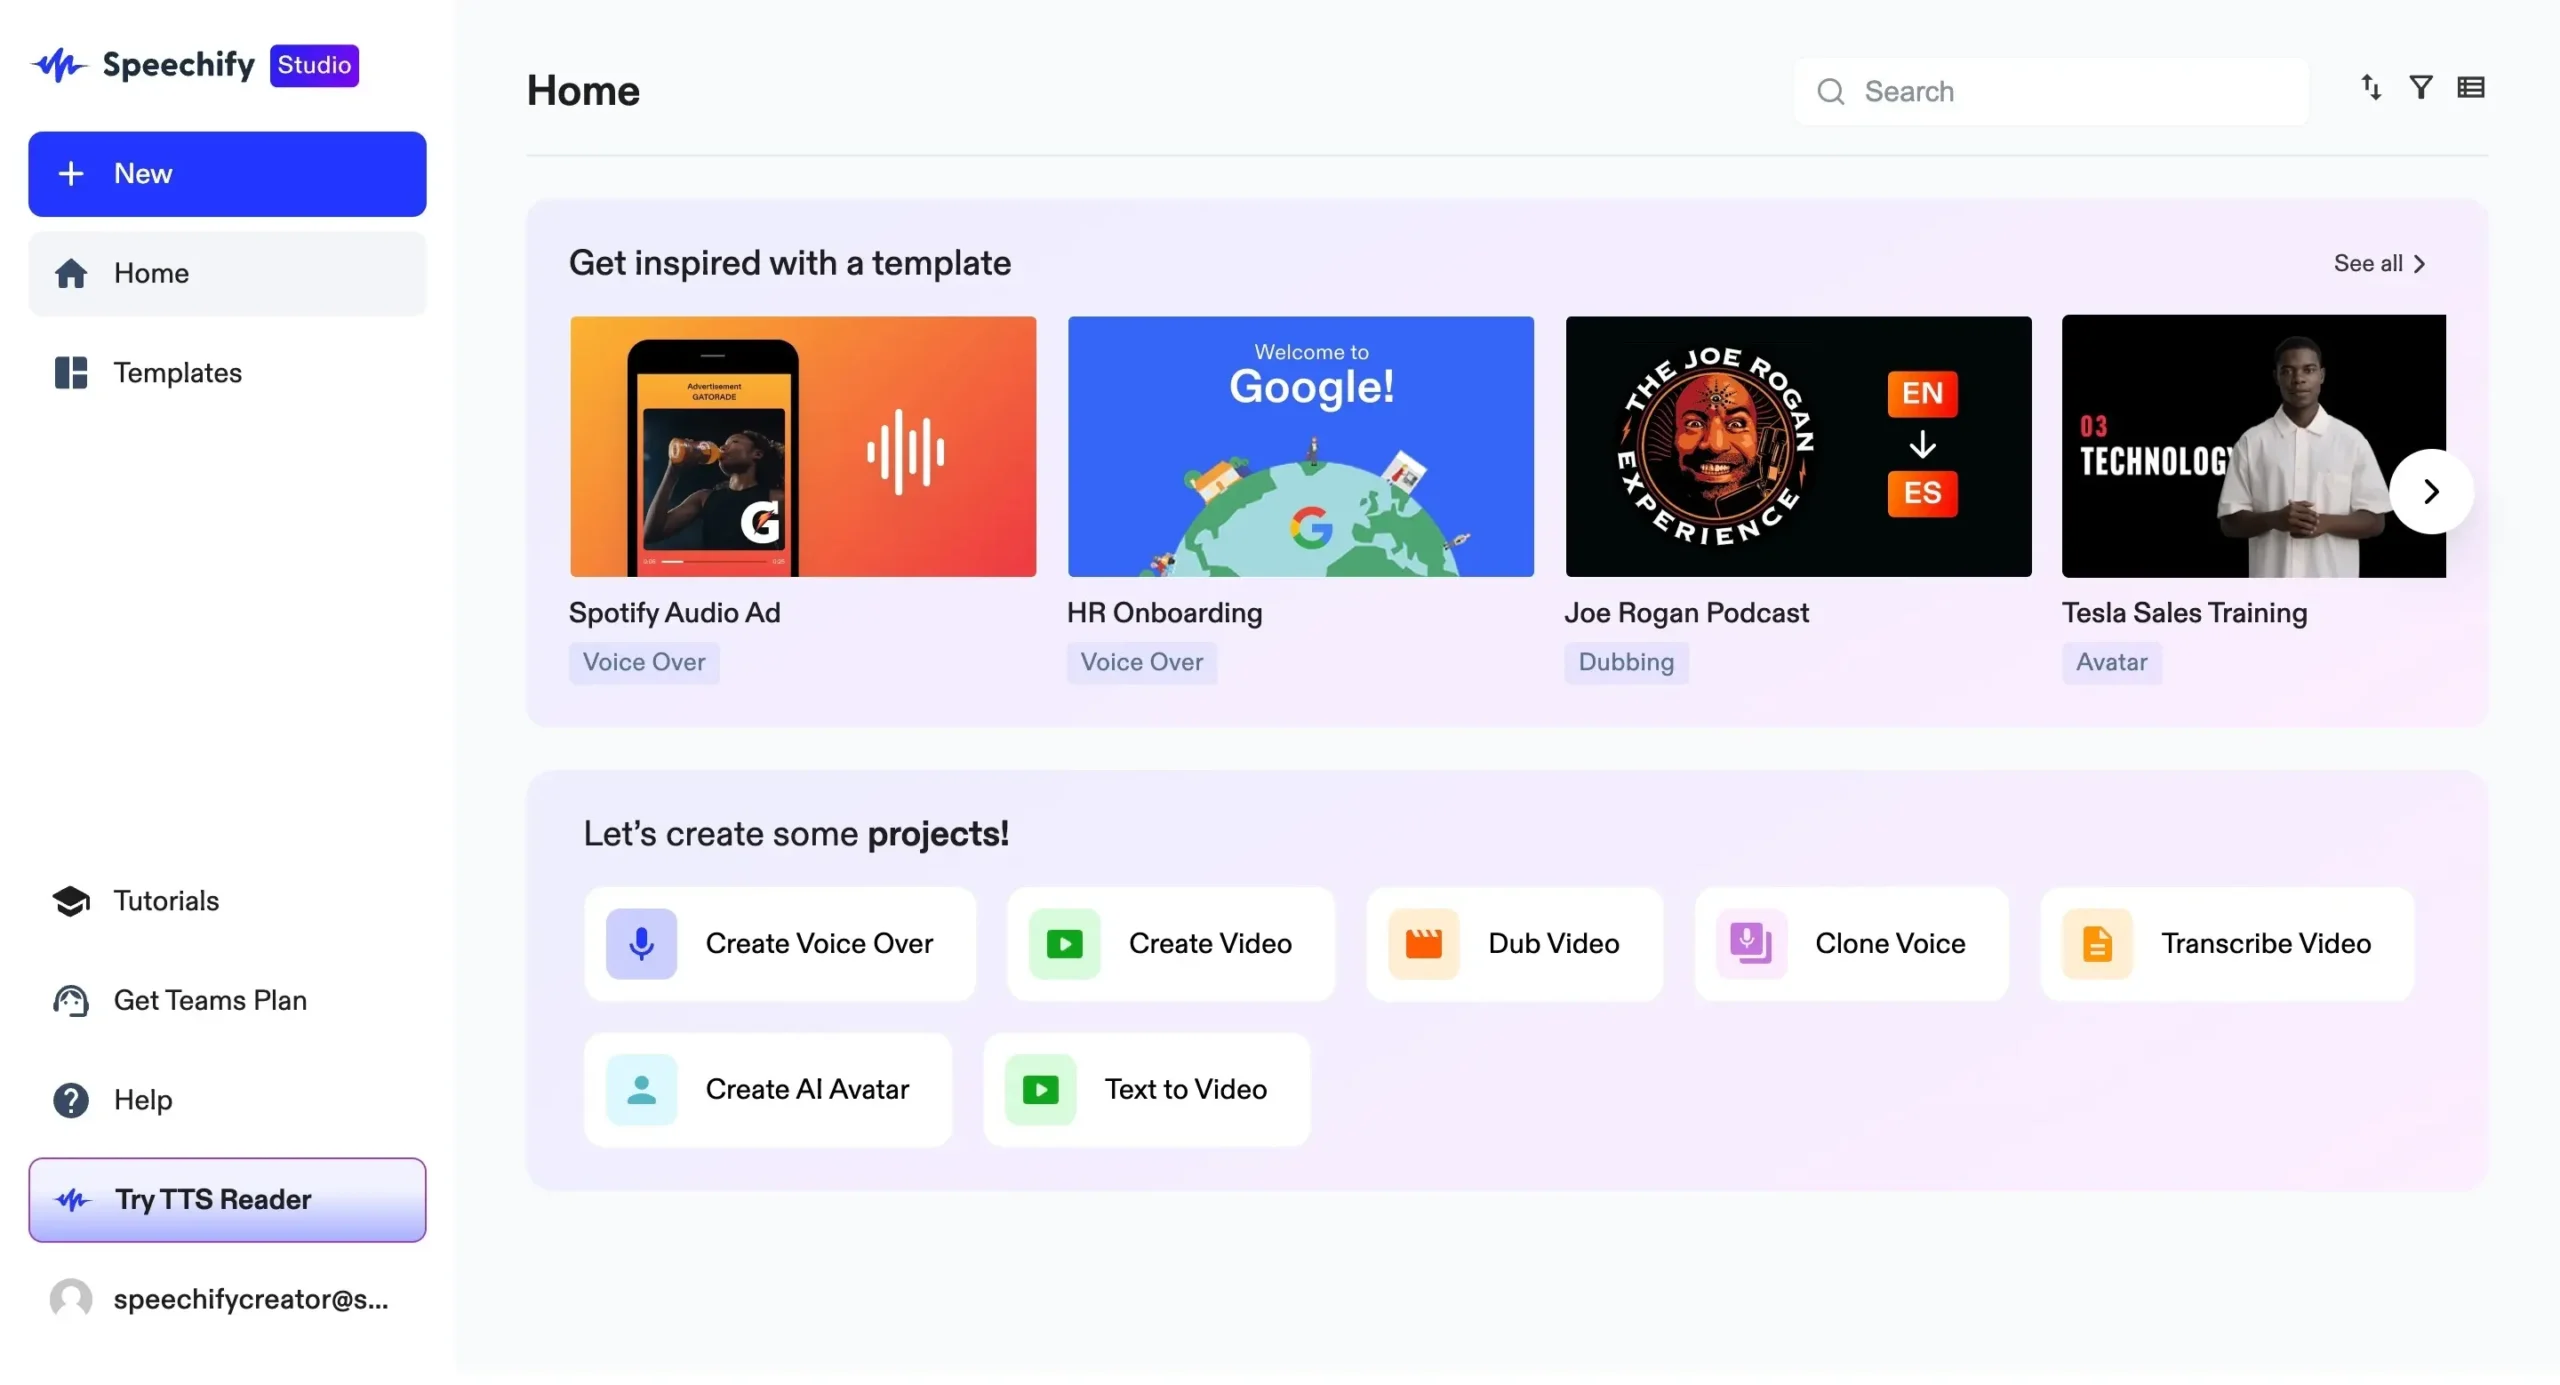
First impressions: clean and minimal with enough white space.
What we are interested in is the left menu bar here. It has everything you'll need.
Click on "Templates," for example, and you will see a list of all the templates you can start using right away.
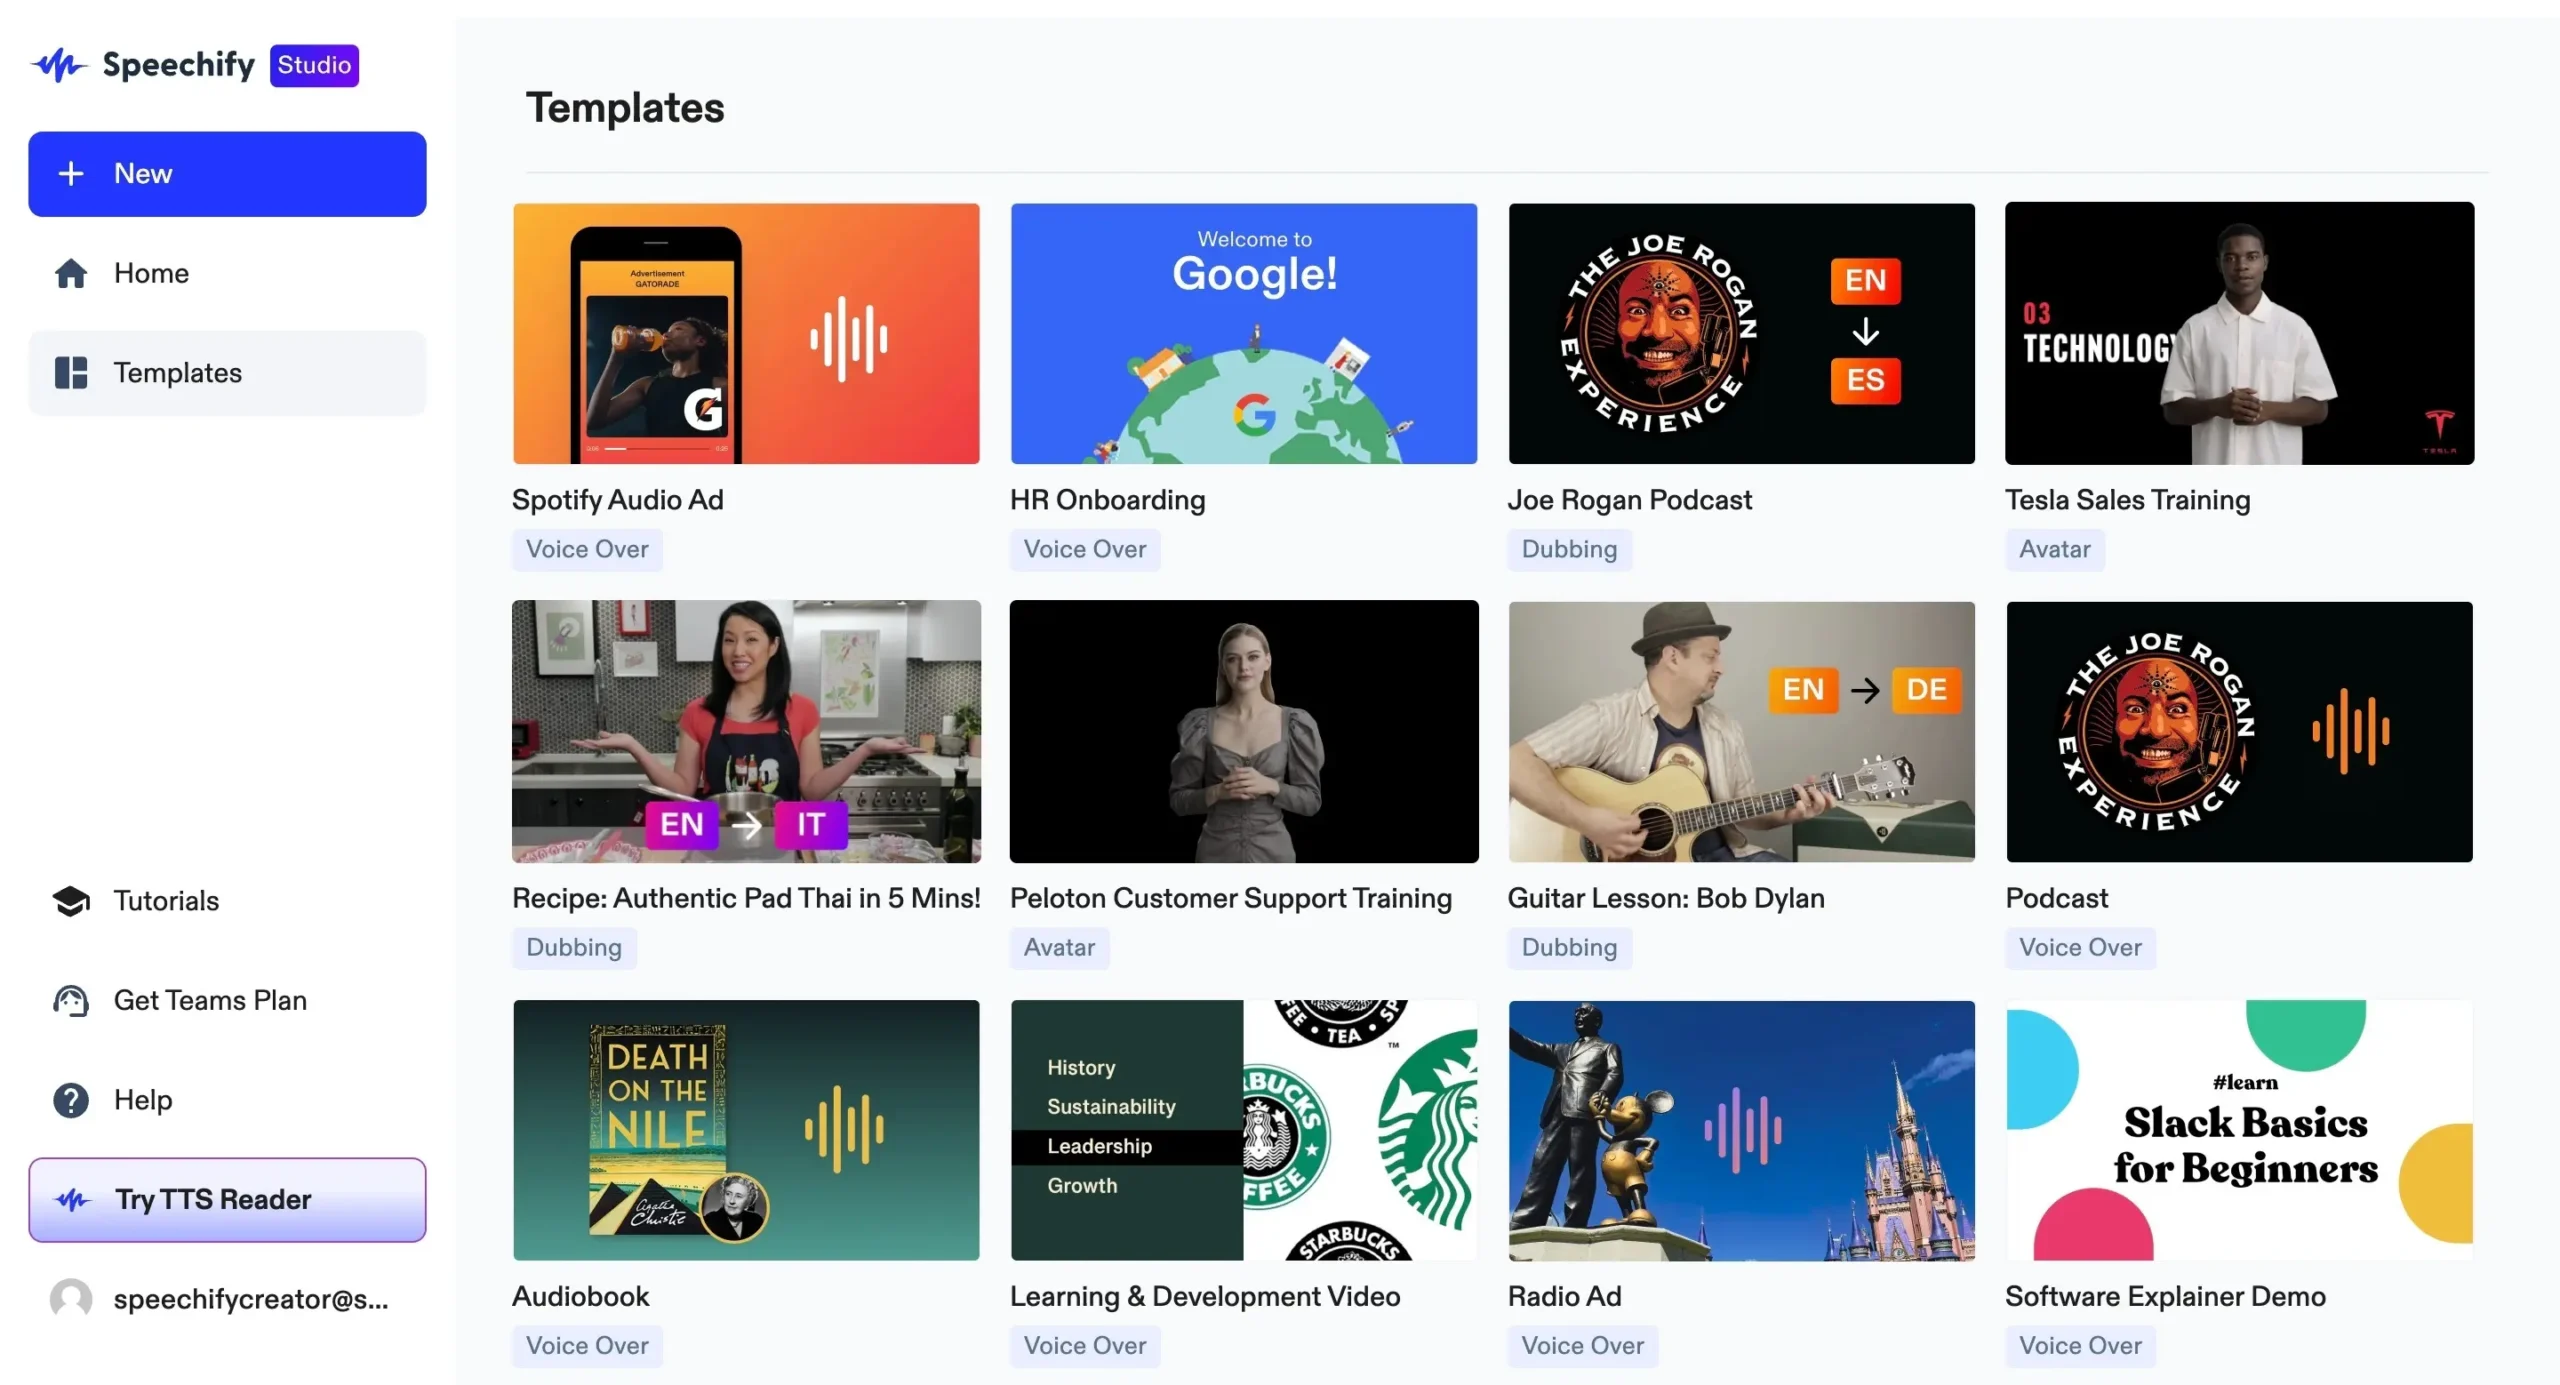
Below each template, you'll see its use case (e.g., Voice Over). Click on any template, and it will load in Speechify Studio's editor.
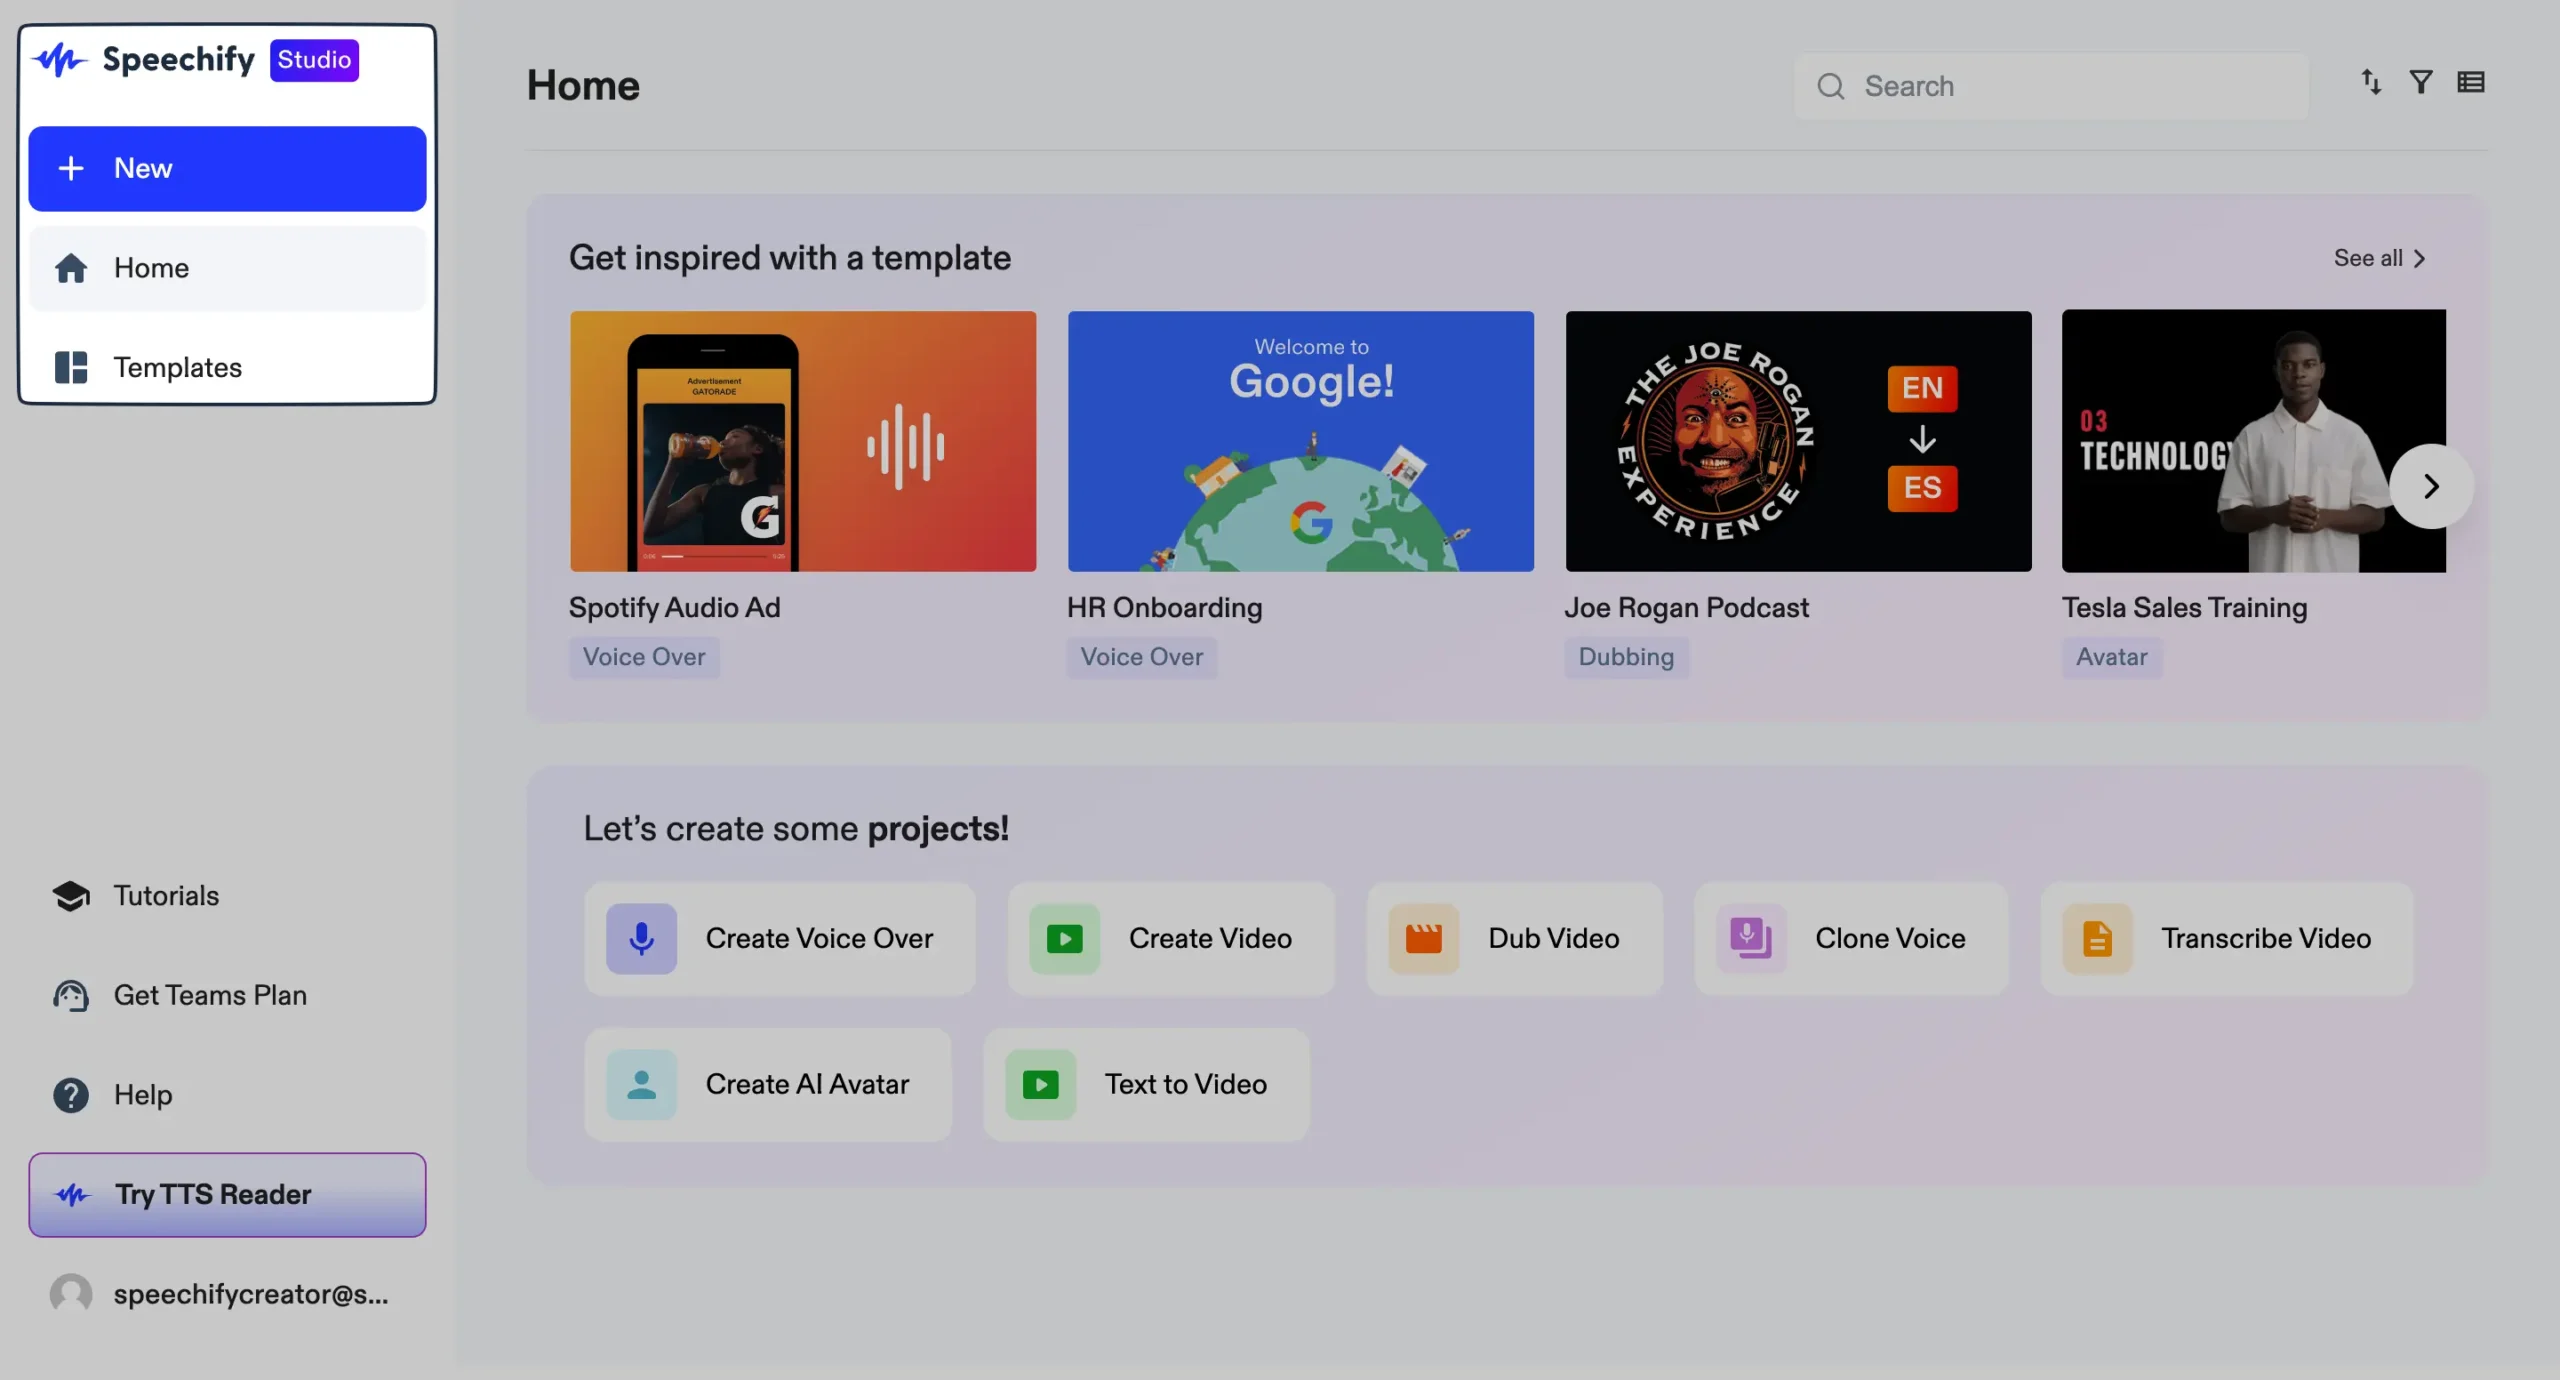
And if you would like to start from scratch with a specific end goal in mind, then click on the “New” button.
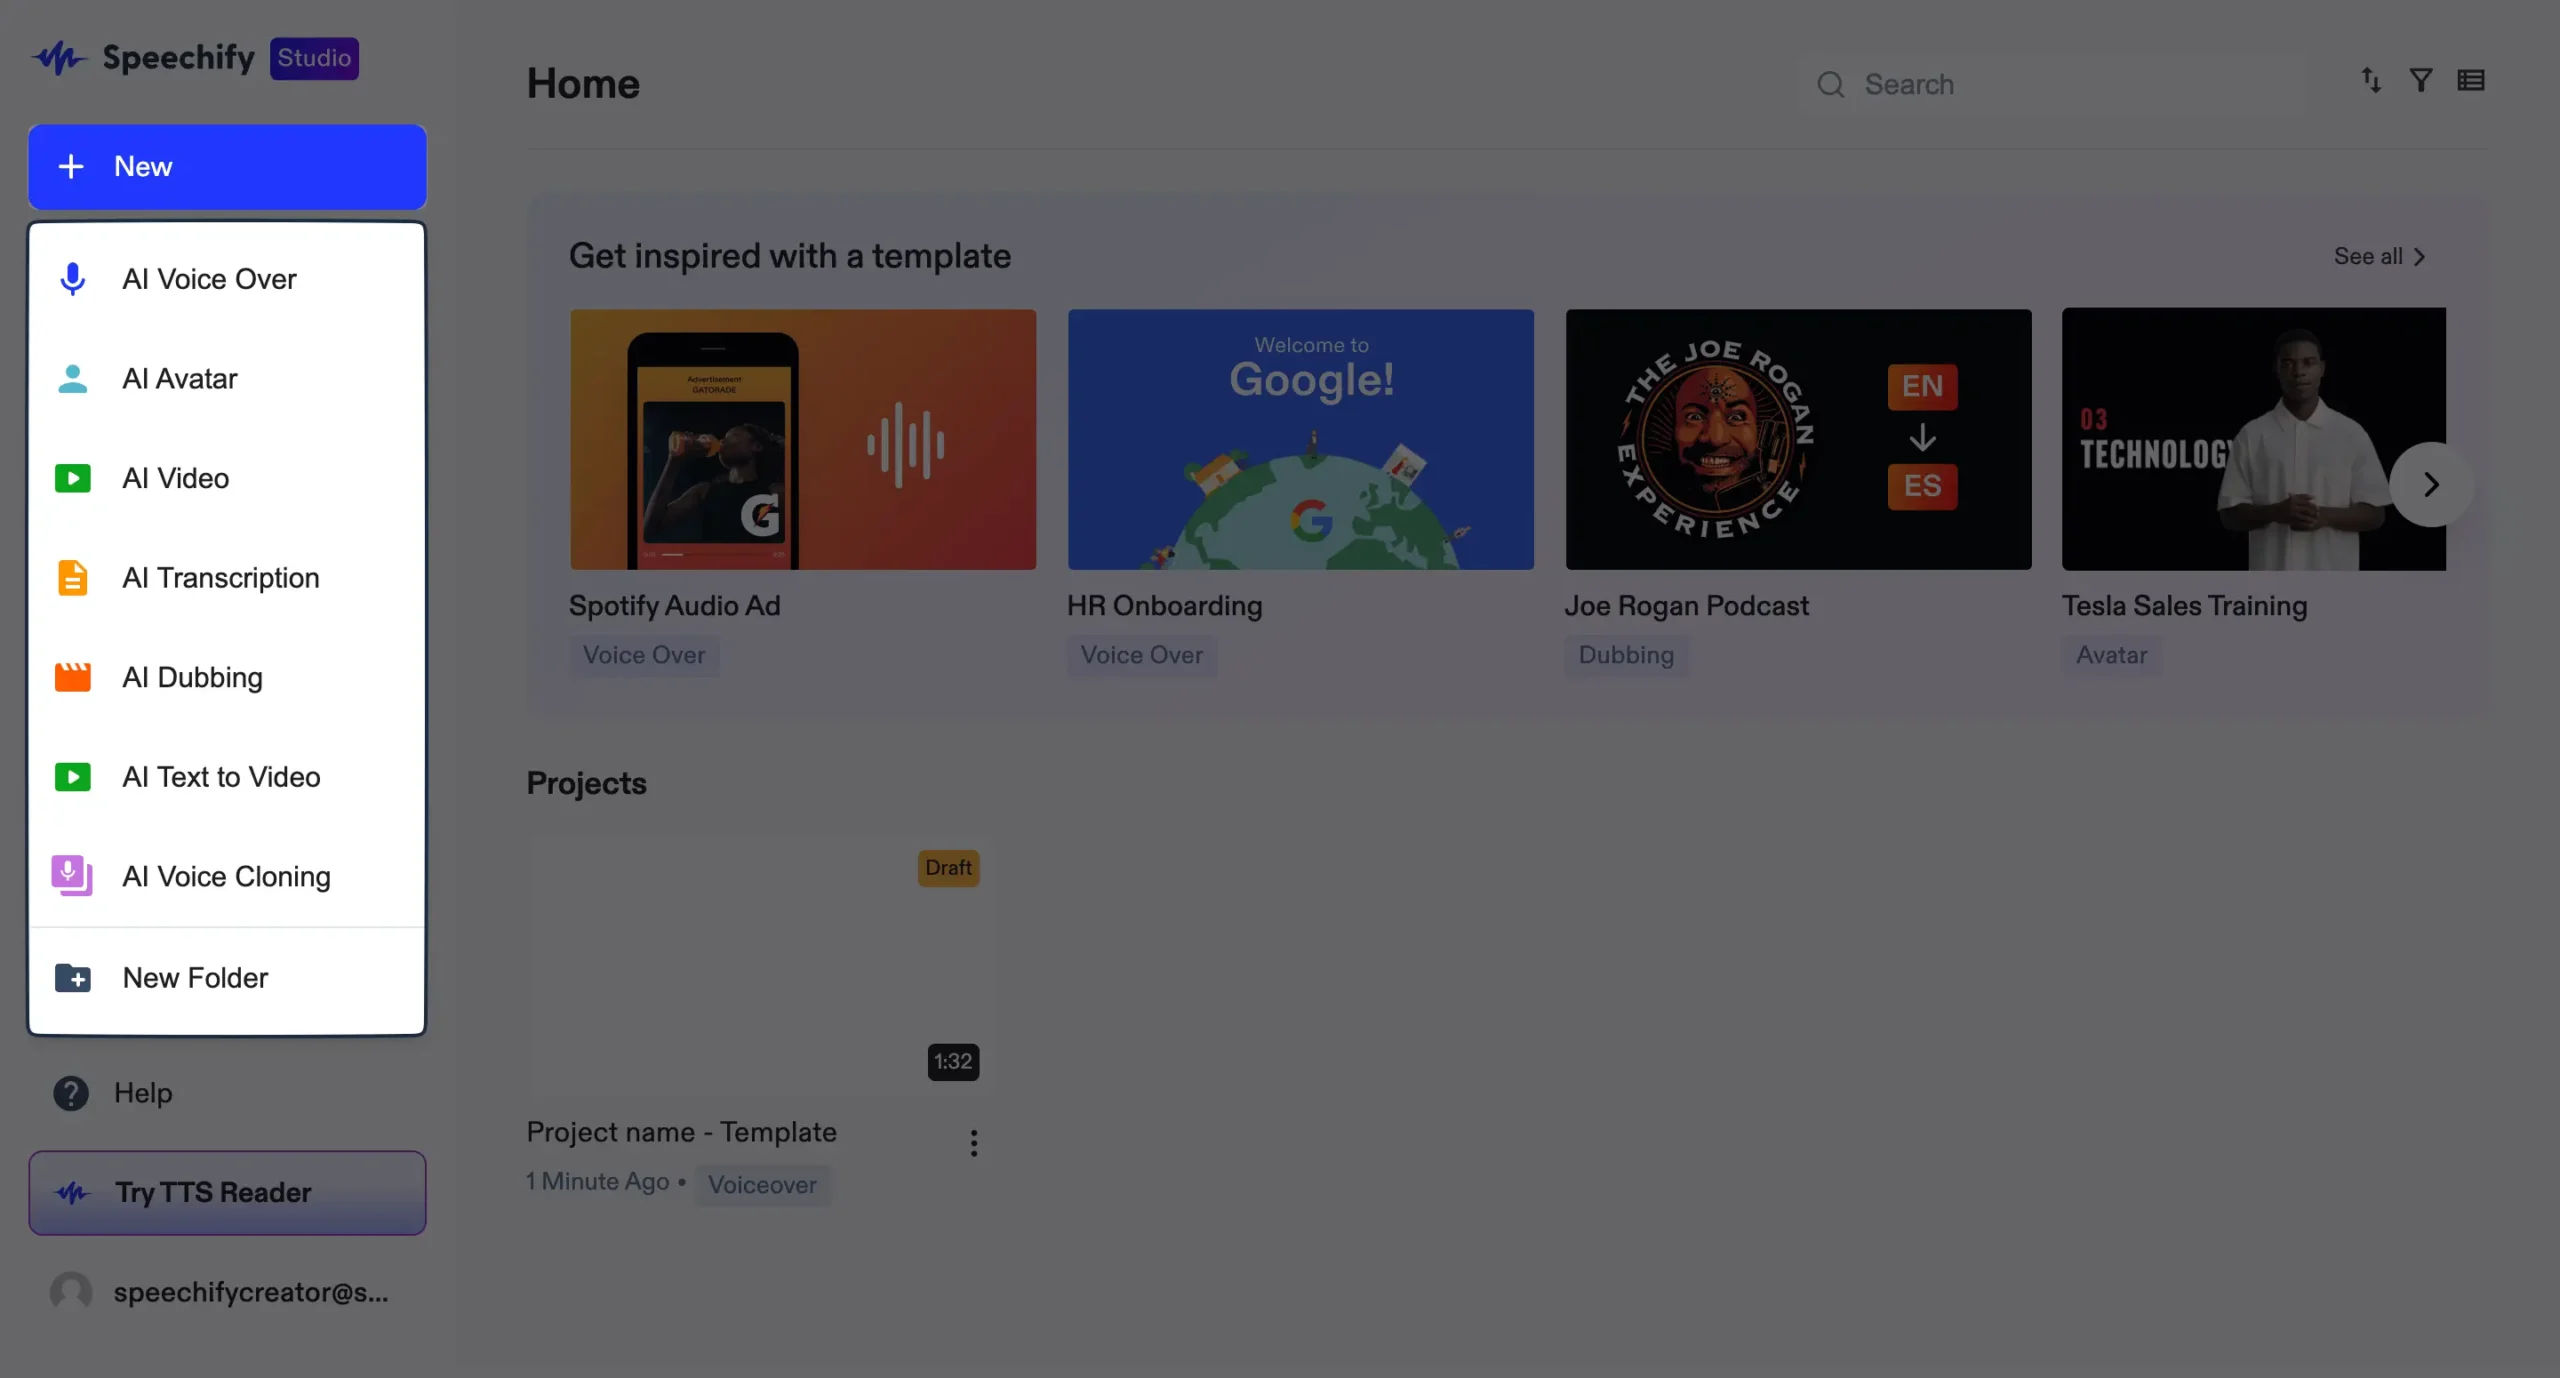
Next, select what you want to do (for example: AI voice-over).
Again, you will be forwarded to the editor with, in this case, all the essential features for AI voice-over—because you selected that.
You get the basic idea!
Now, let's look at all six generative AI Studio features one by one.
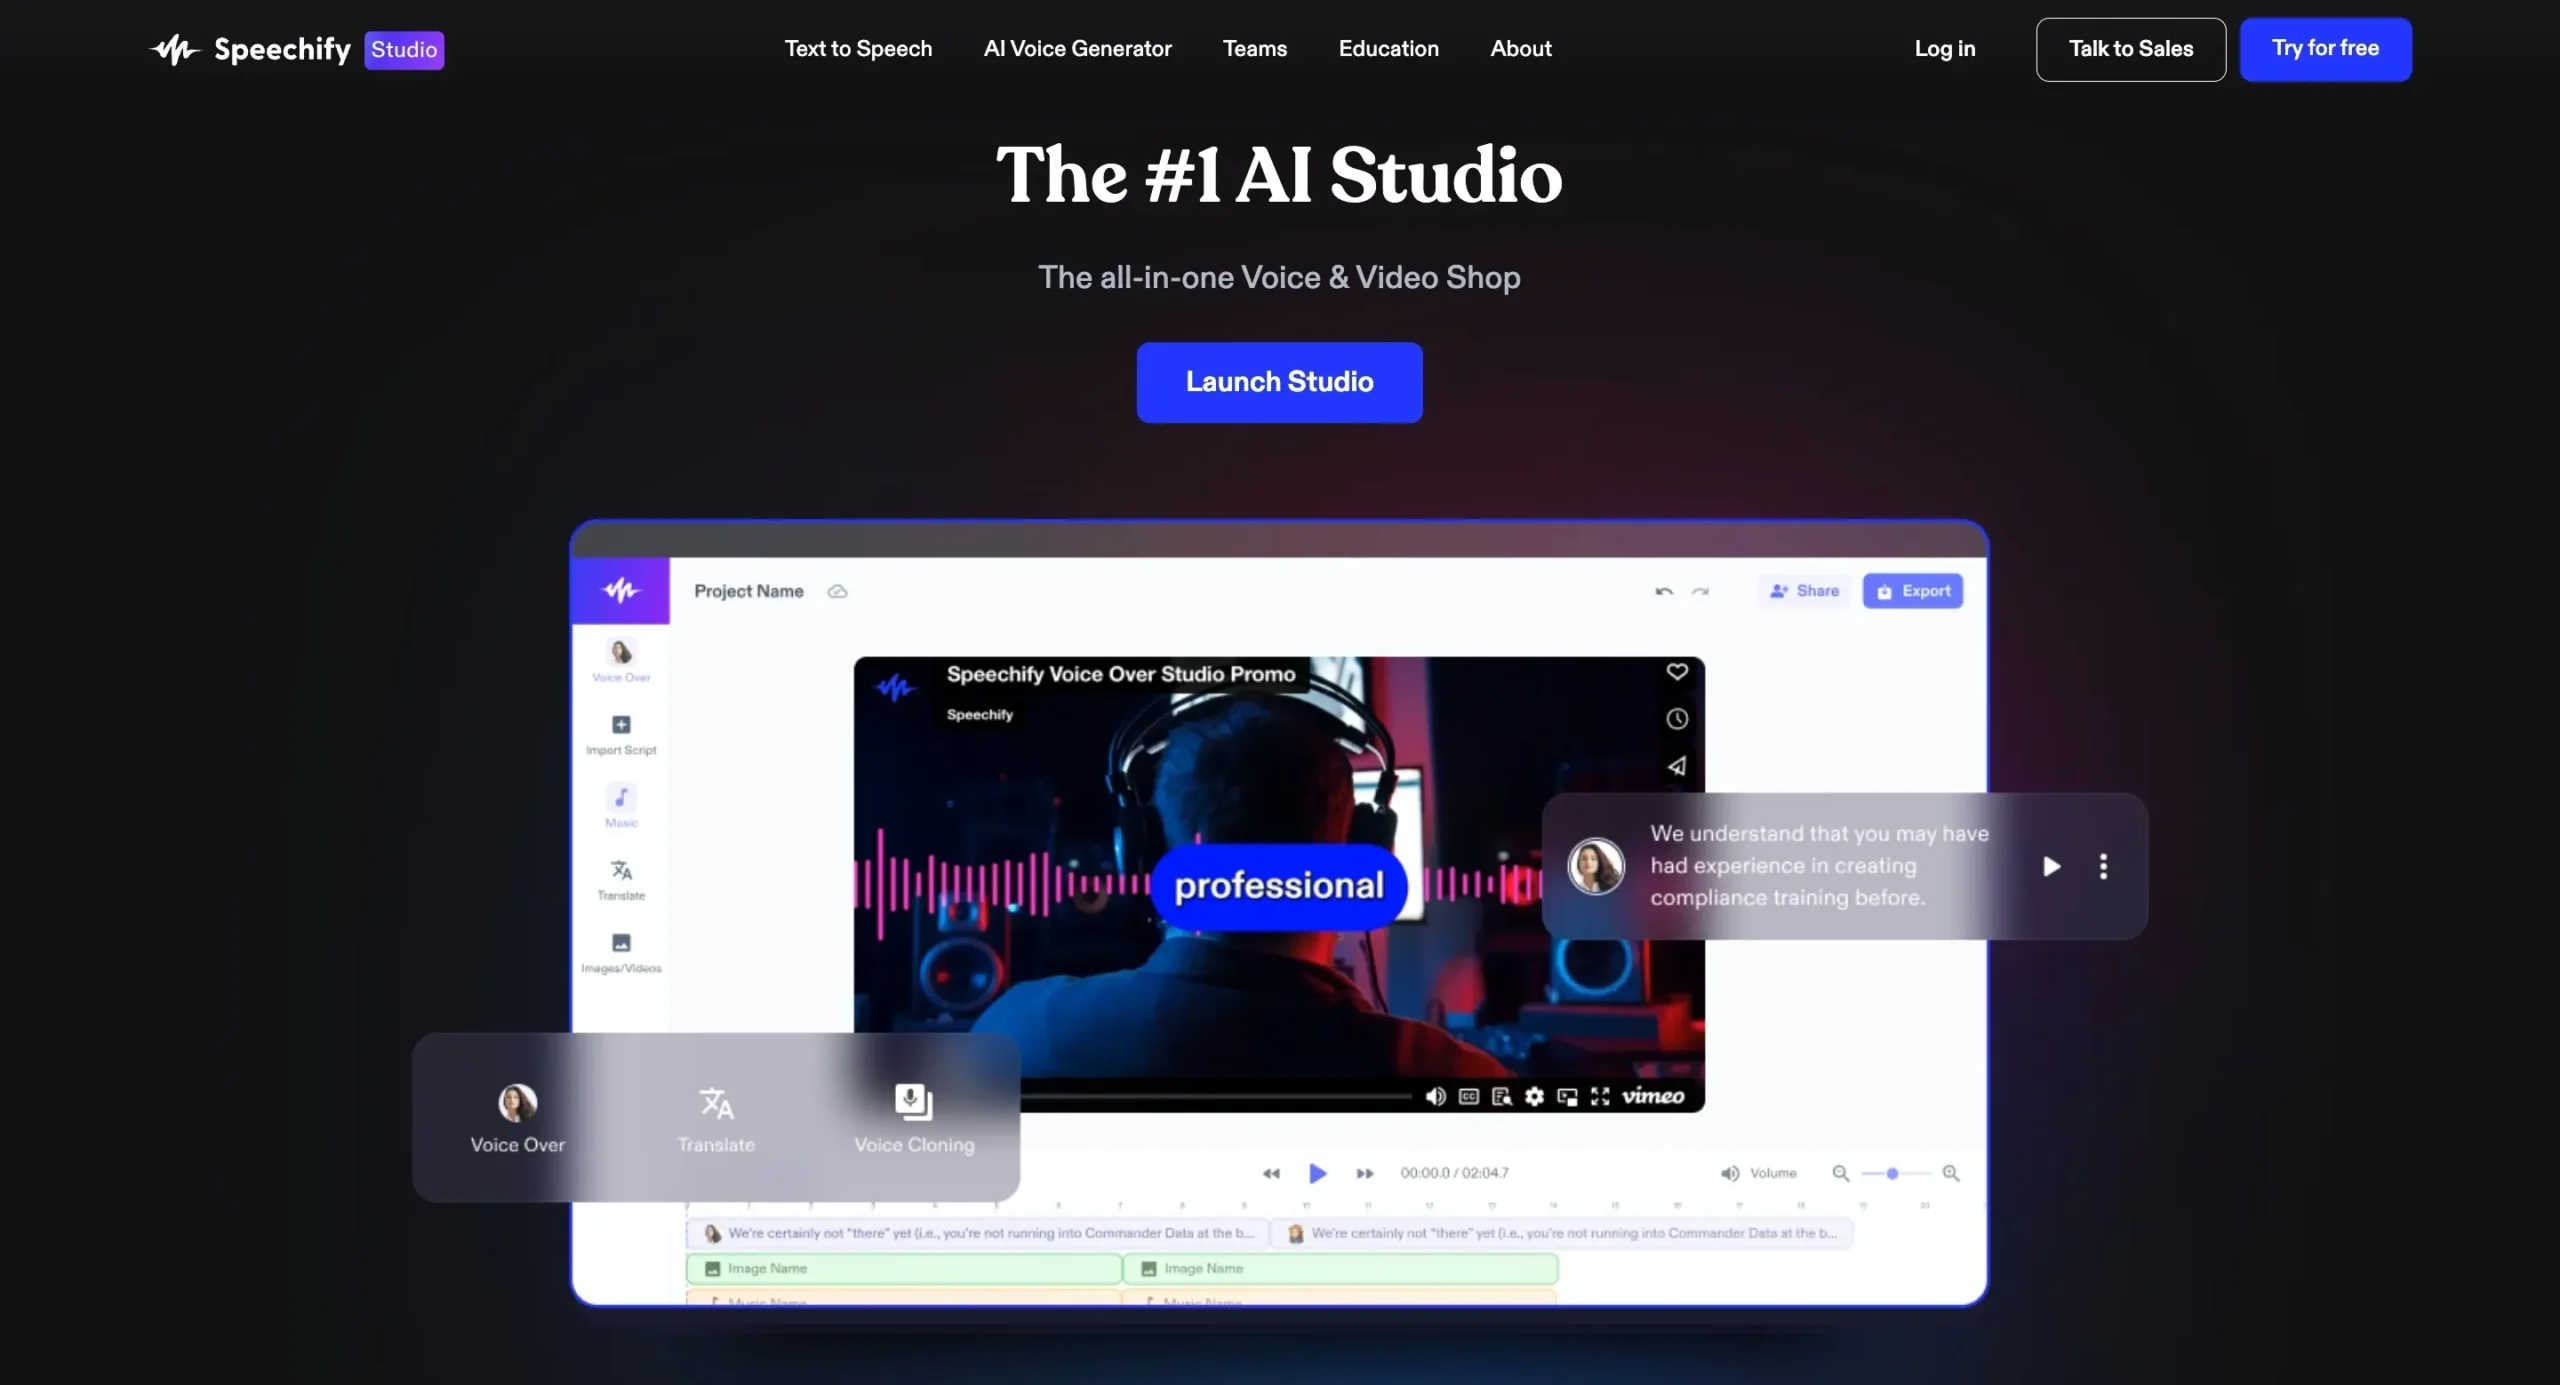
1. AI Voice Over
With Speechify, you can create natural voiceovers in over 50 languages and 100+ accents. Type or paste your script, choose a voice, and bam—instant voiceover.
Here's how to create a voice-over with Speechify Studio:
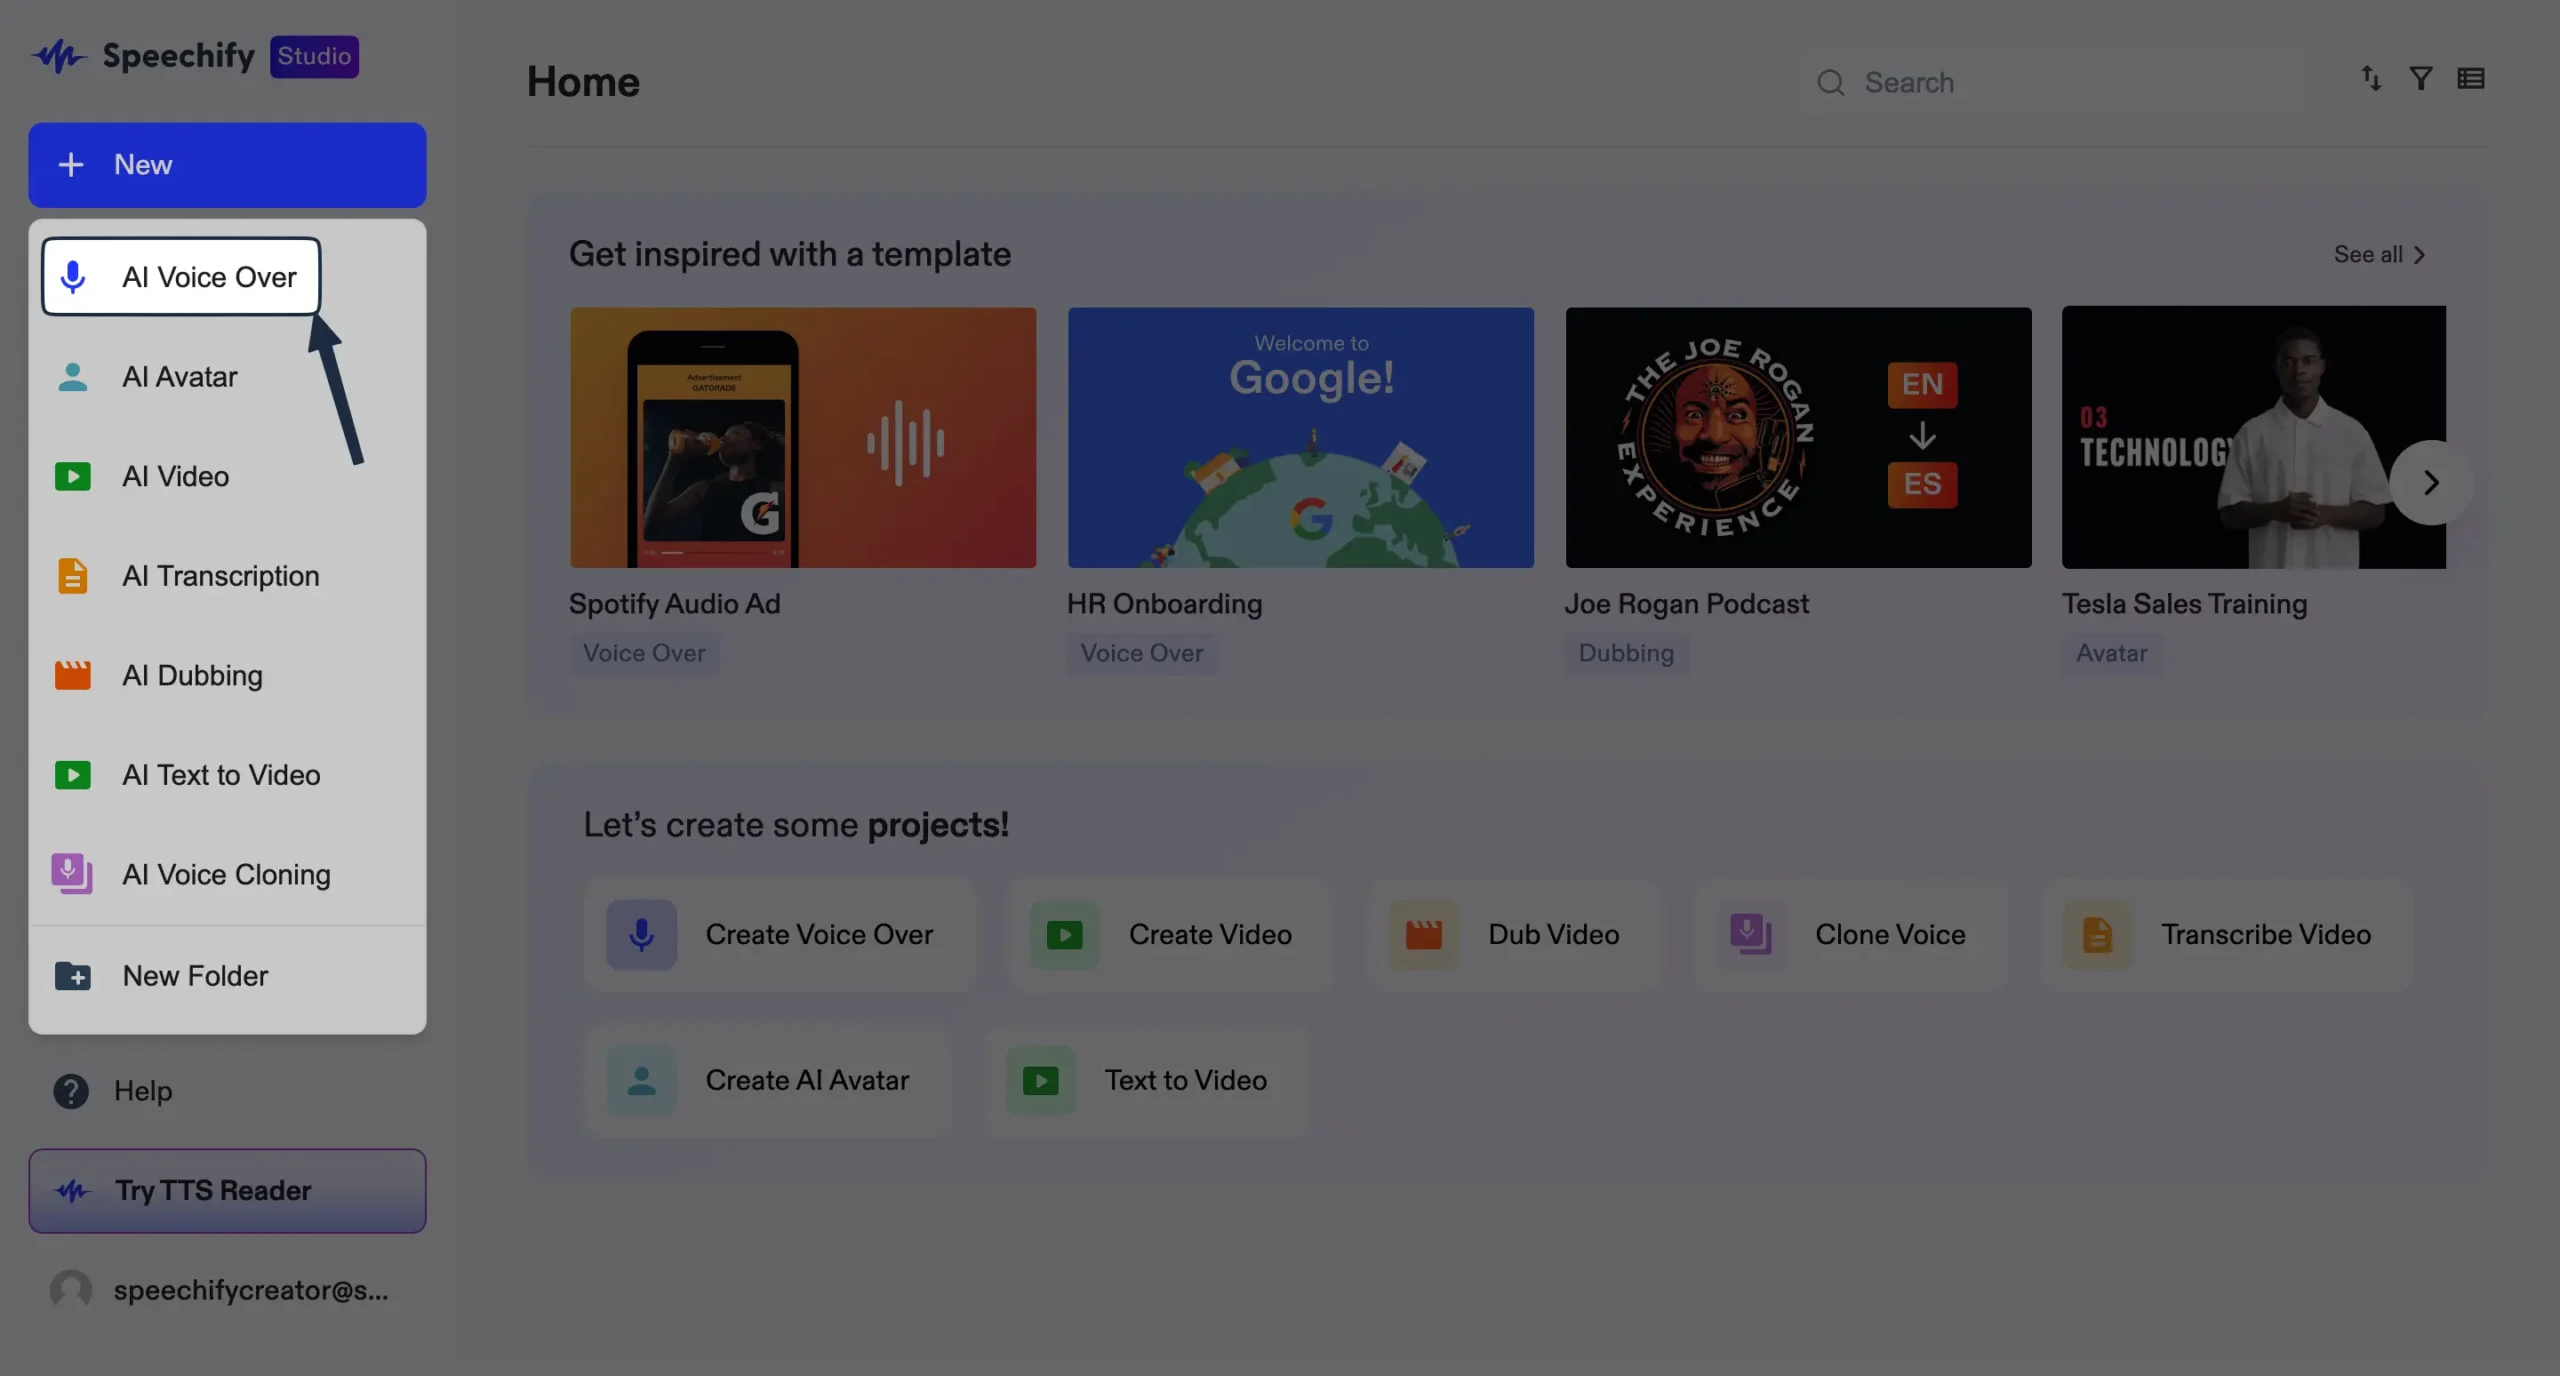
First, select 'AI Voice Over' from the dashboard.
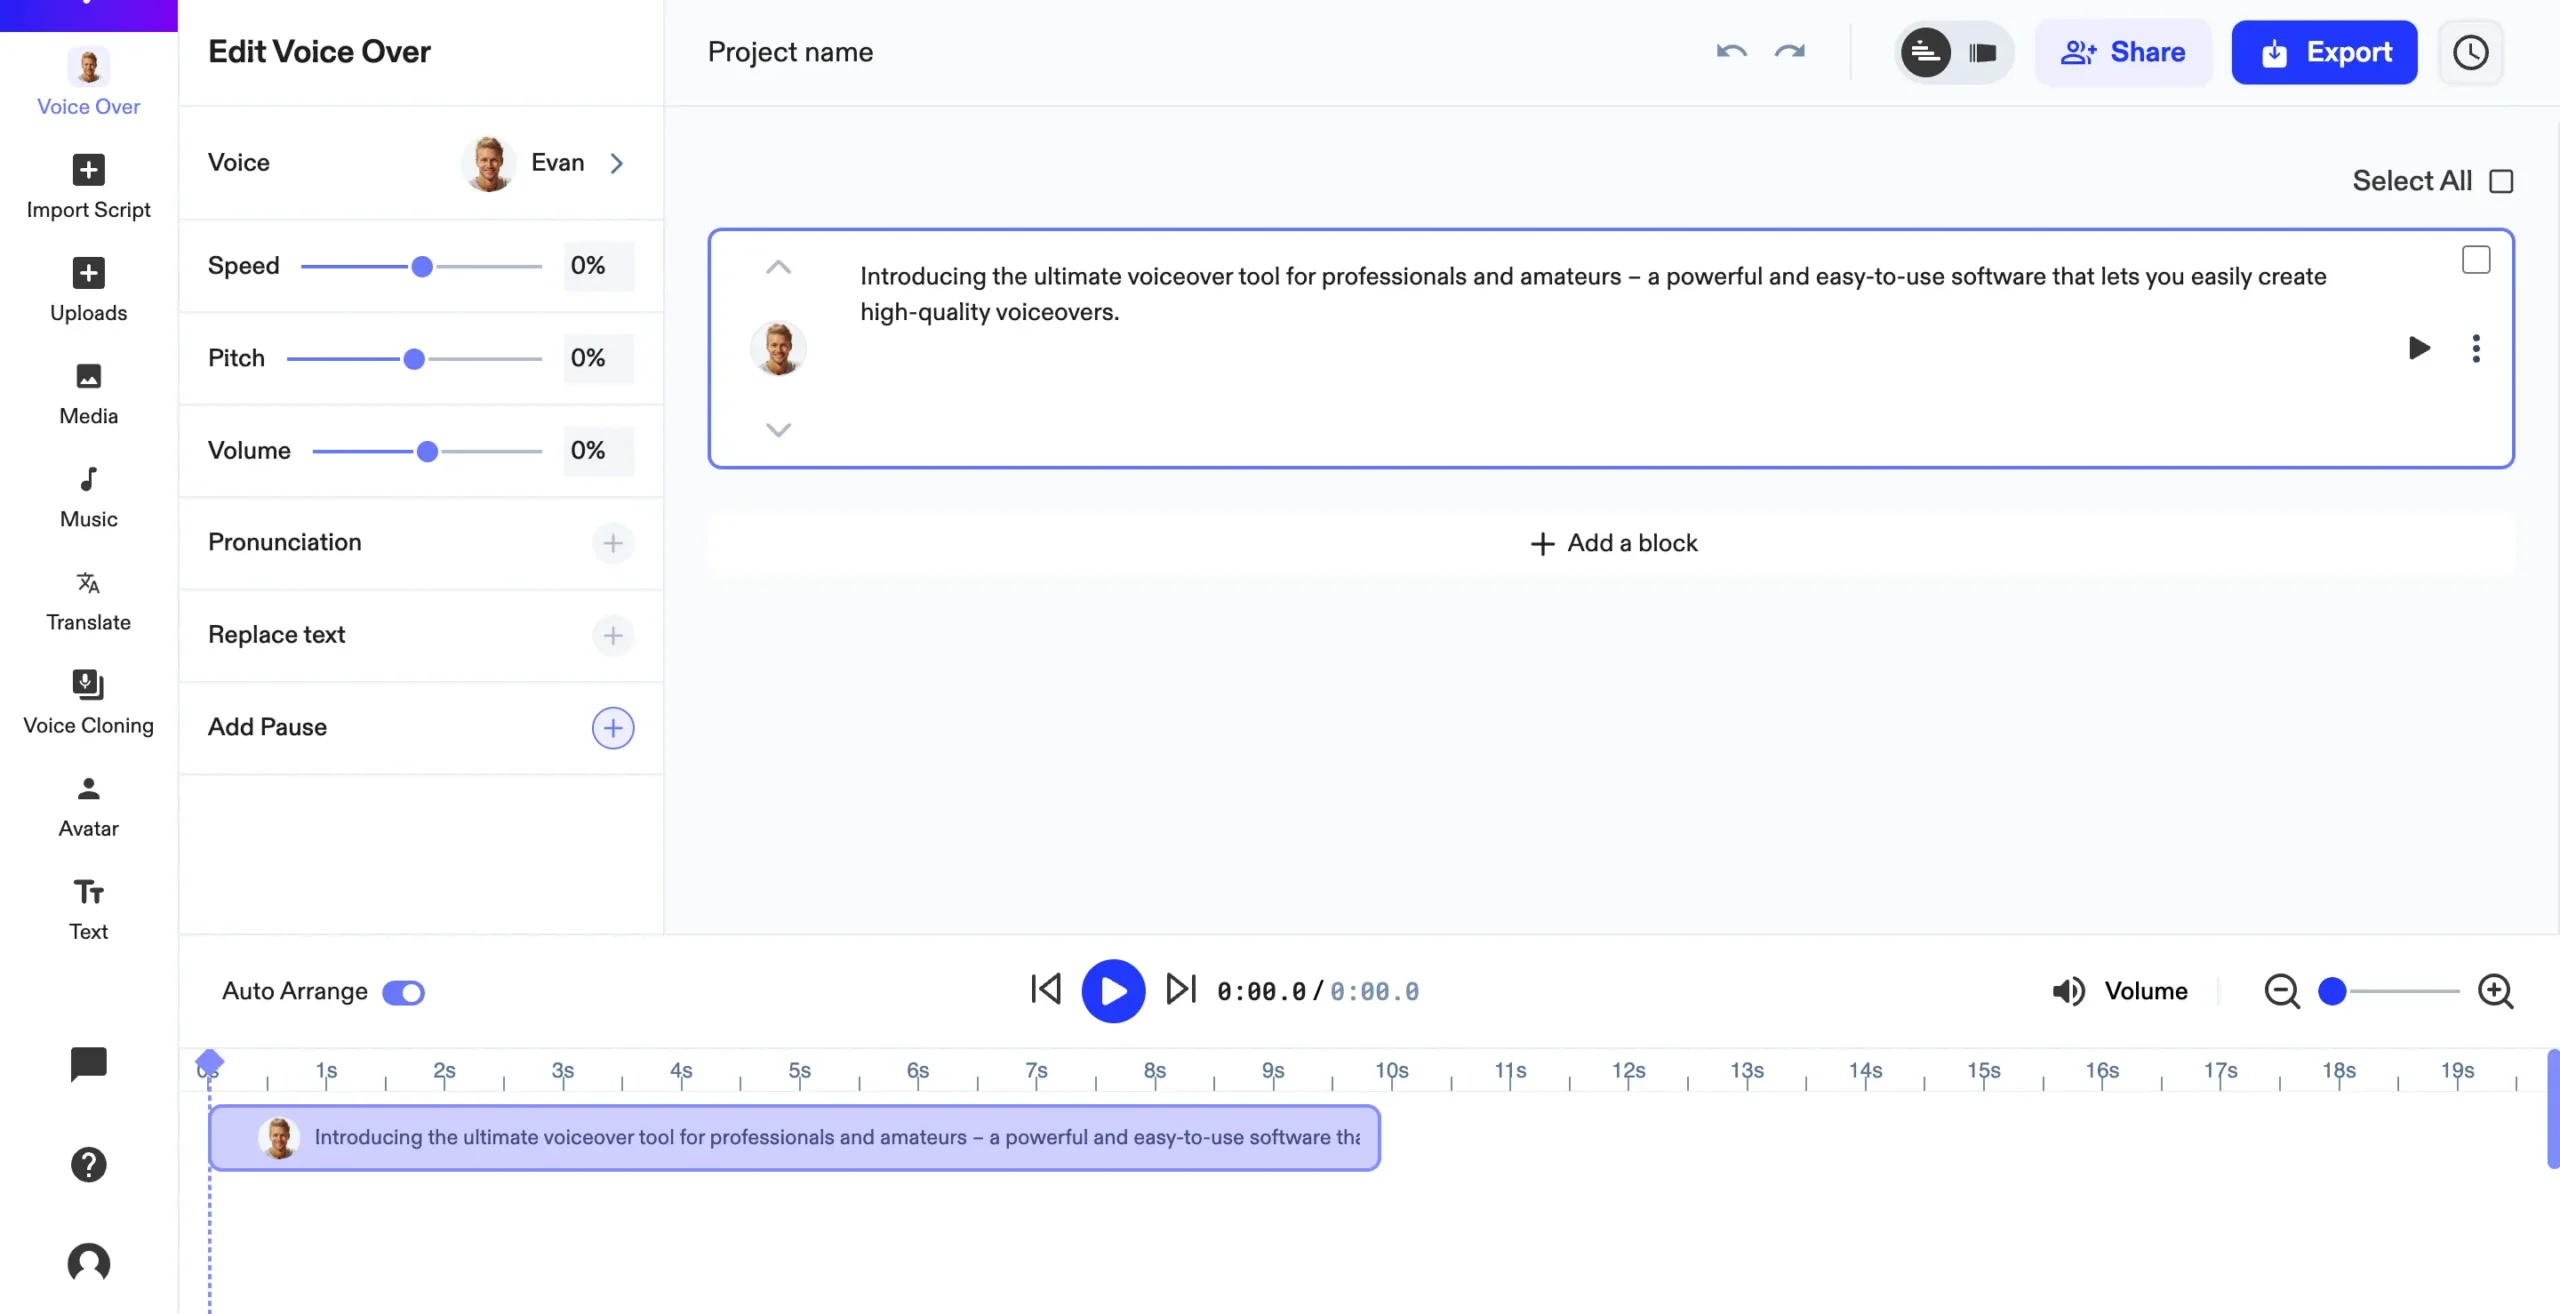
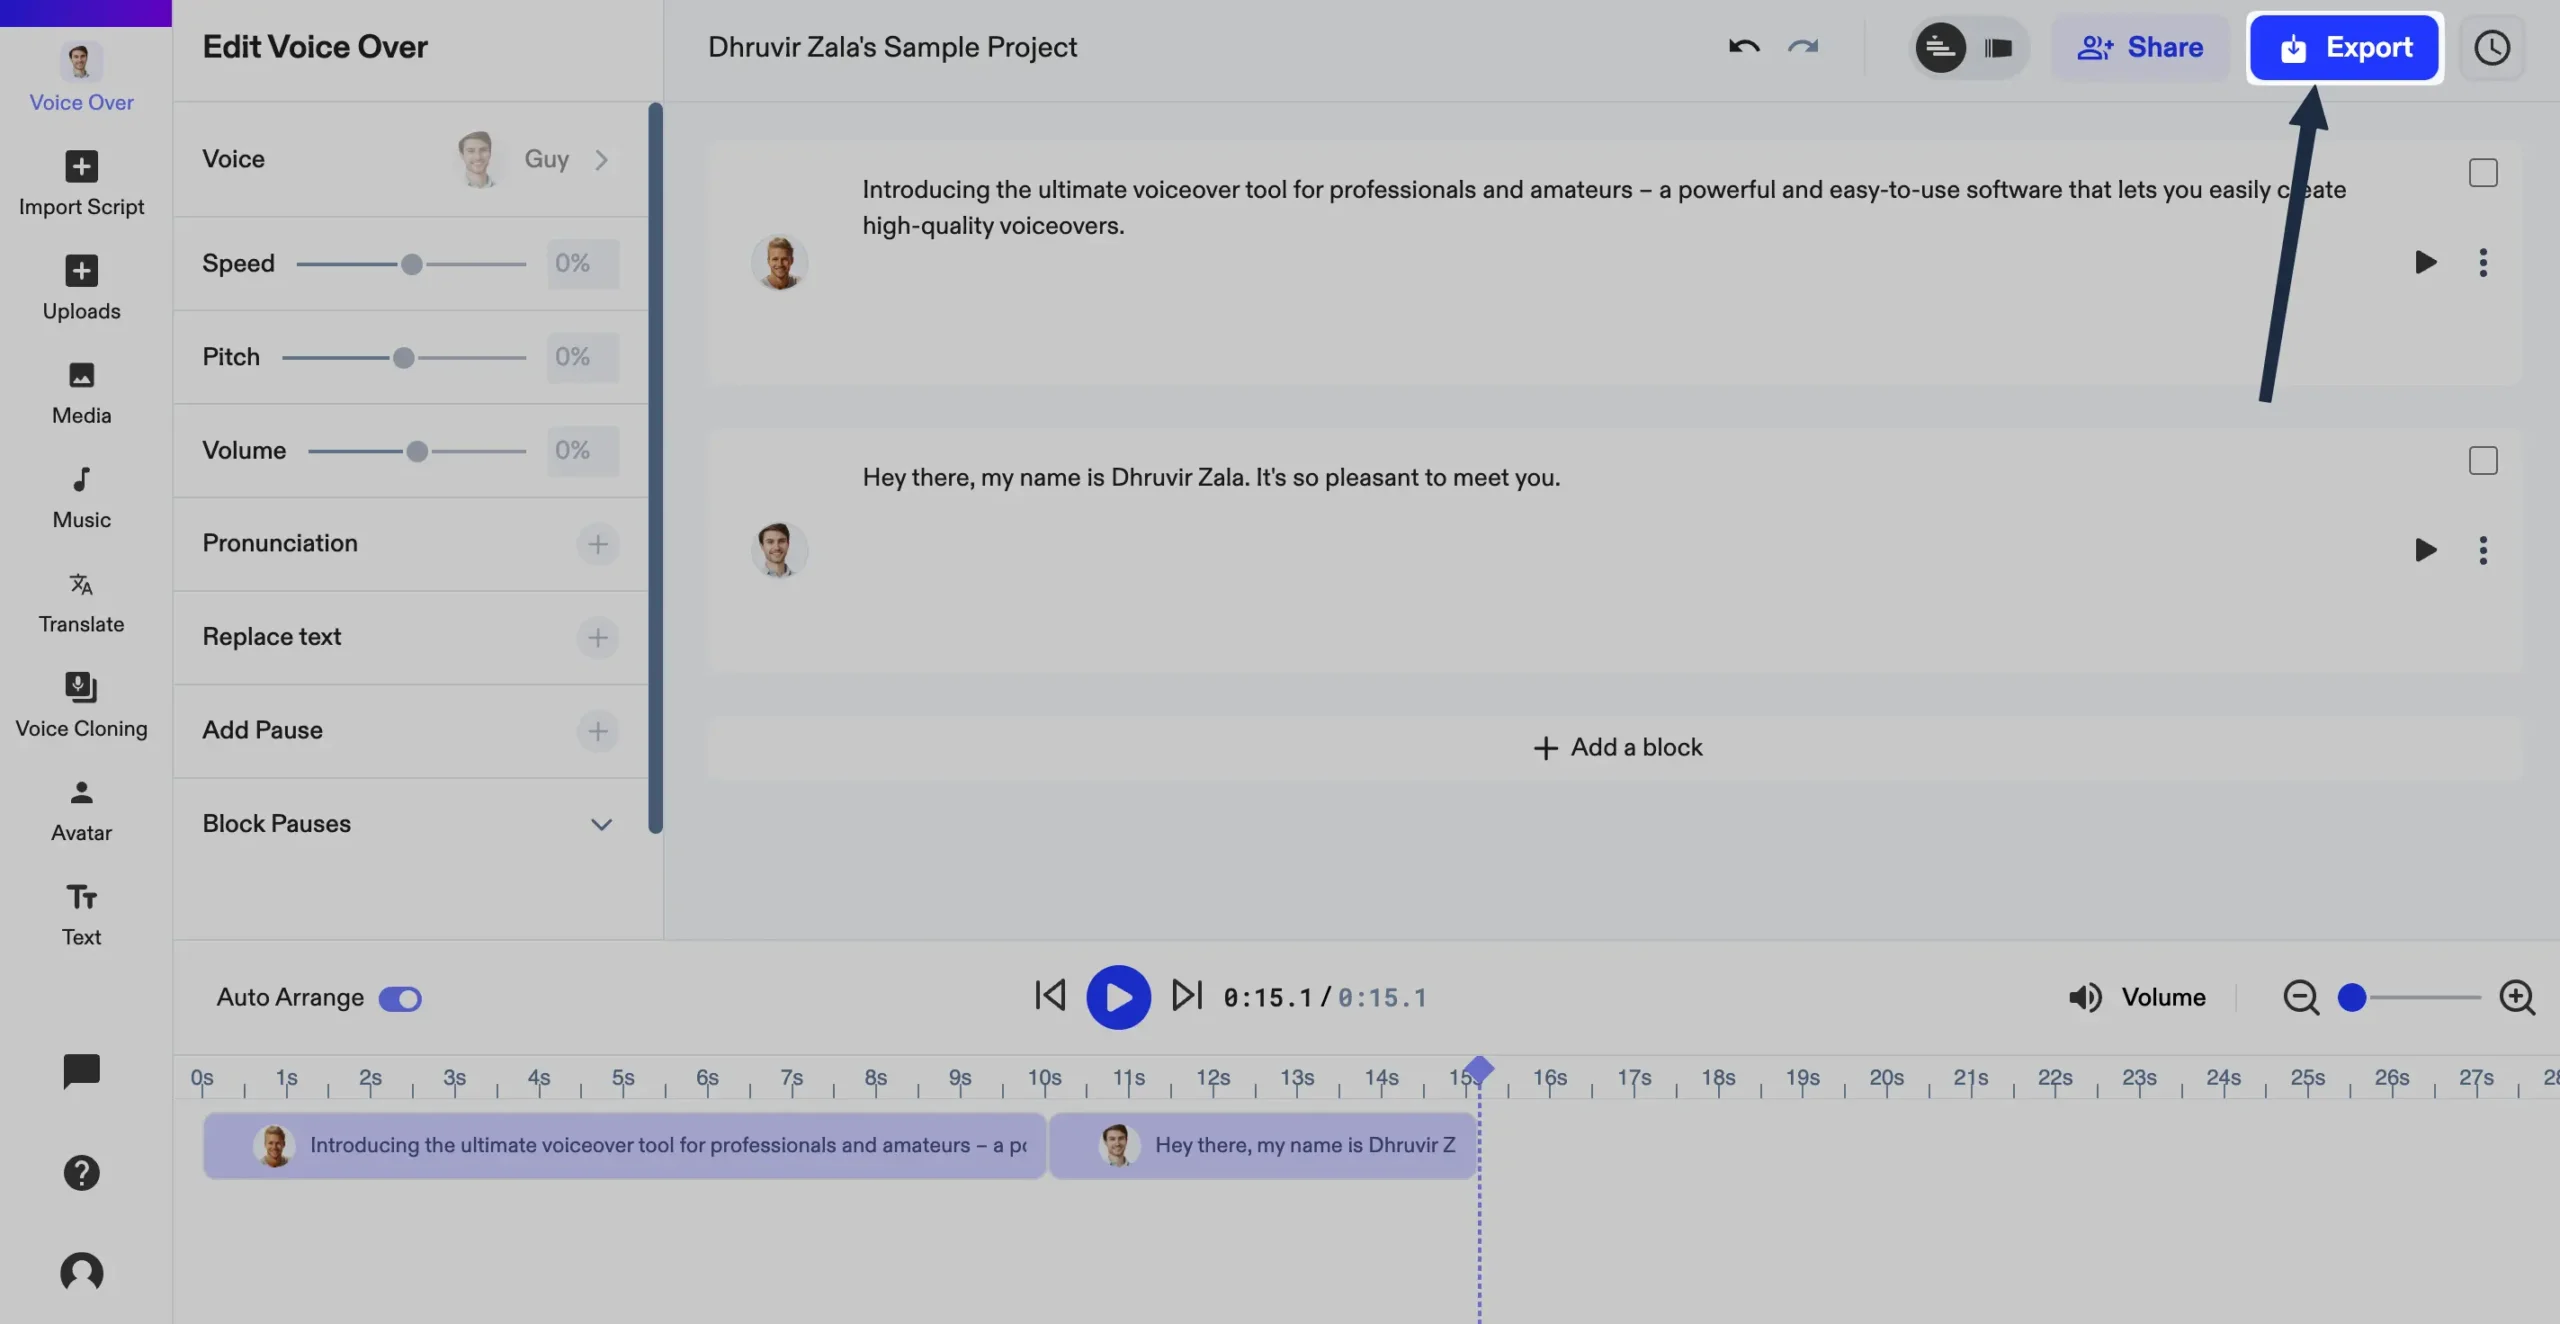
You'll land on this editor:
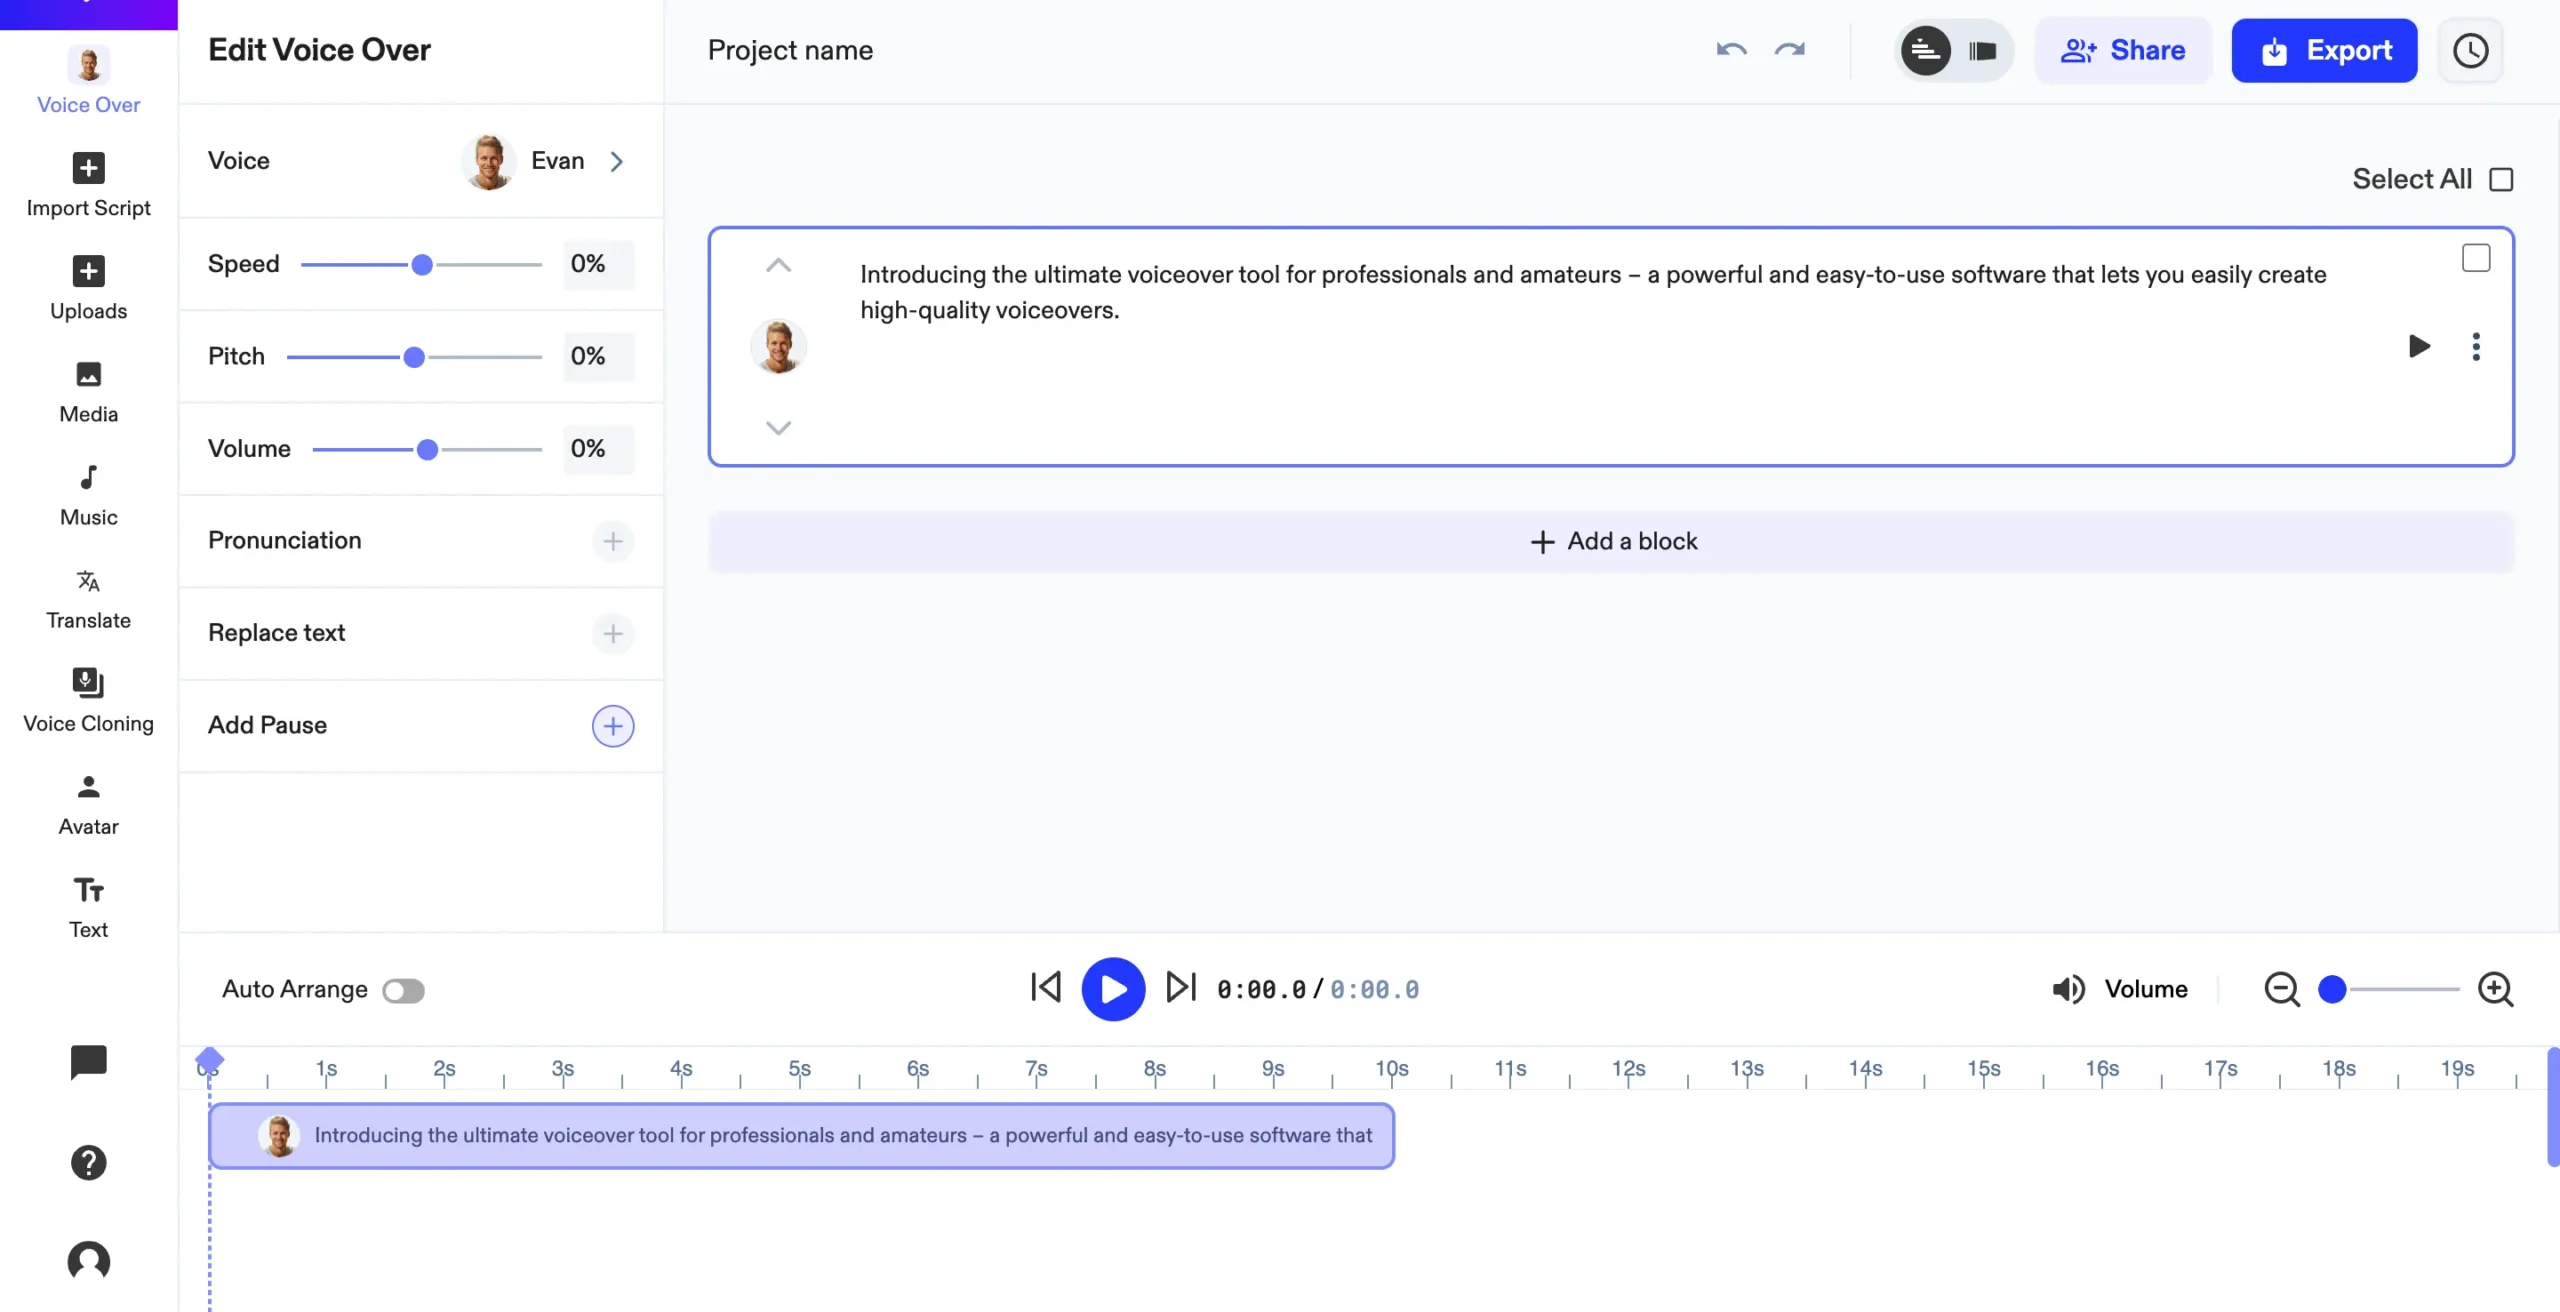
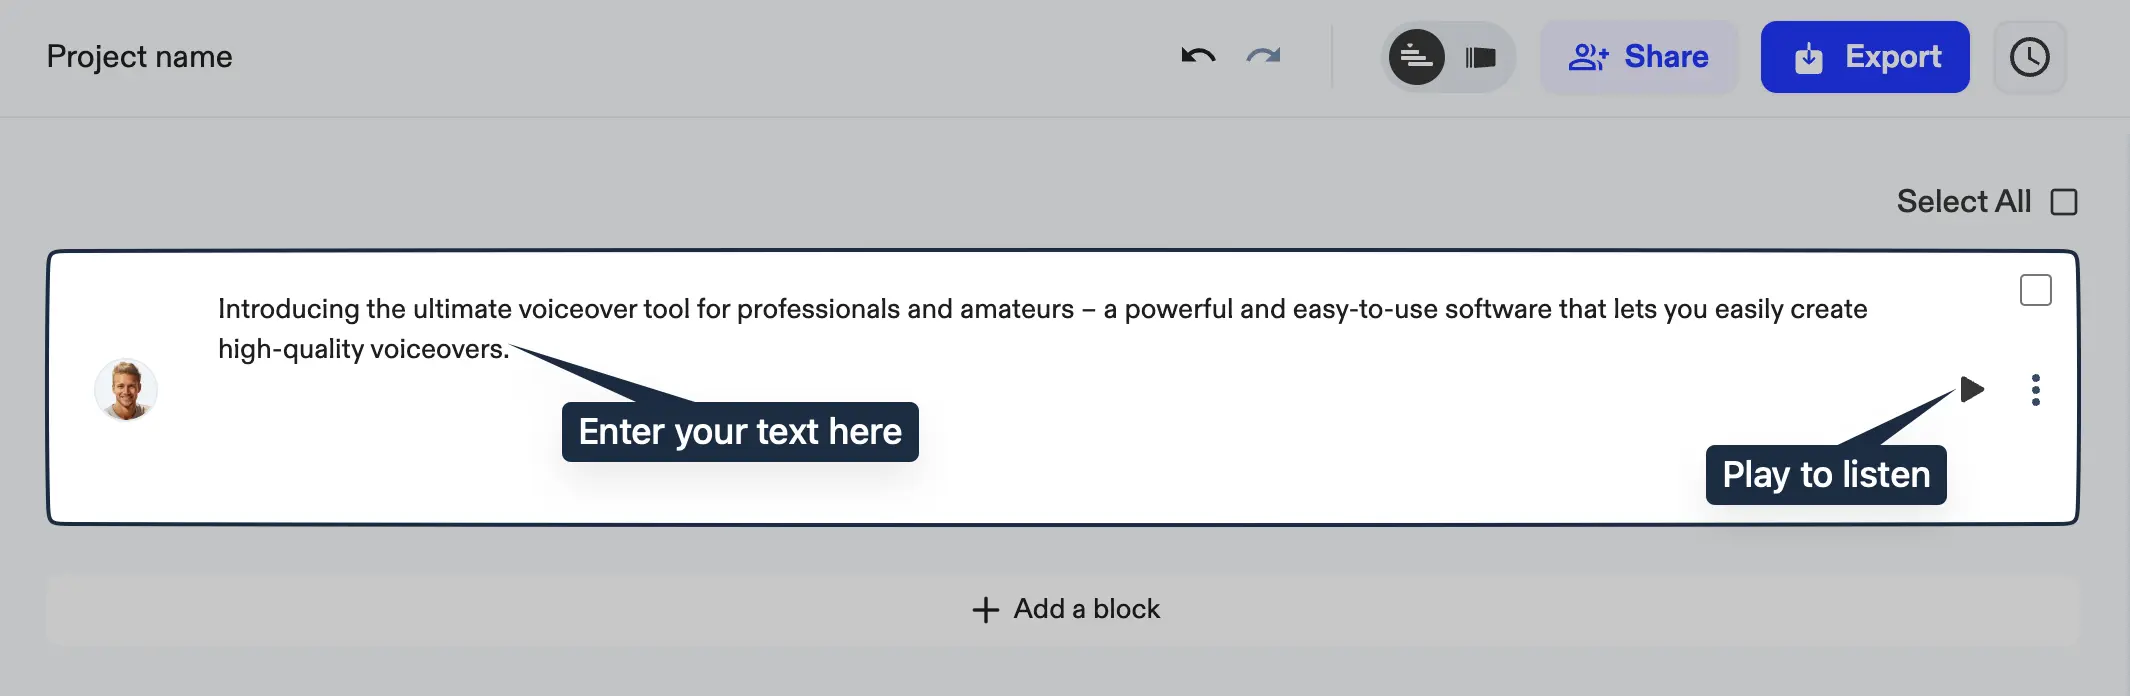
The container is where you can enter your text and click play to listen to your text.
To change the voice, click on the Voice icon.
You'll have access to all the voices in different languages.
If you want different AI voices to speak different paragraphs, you can create a new block, enter your text, and change the voice.
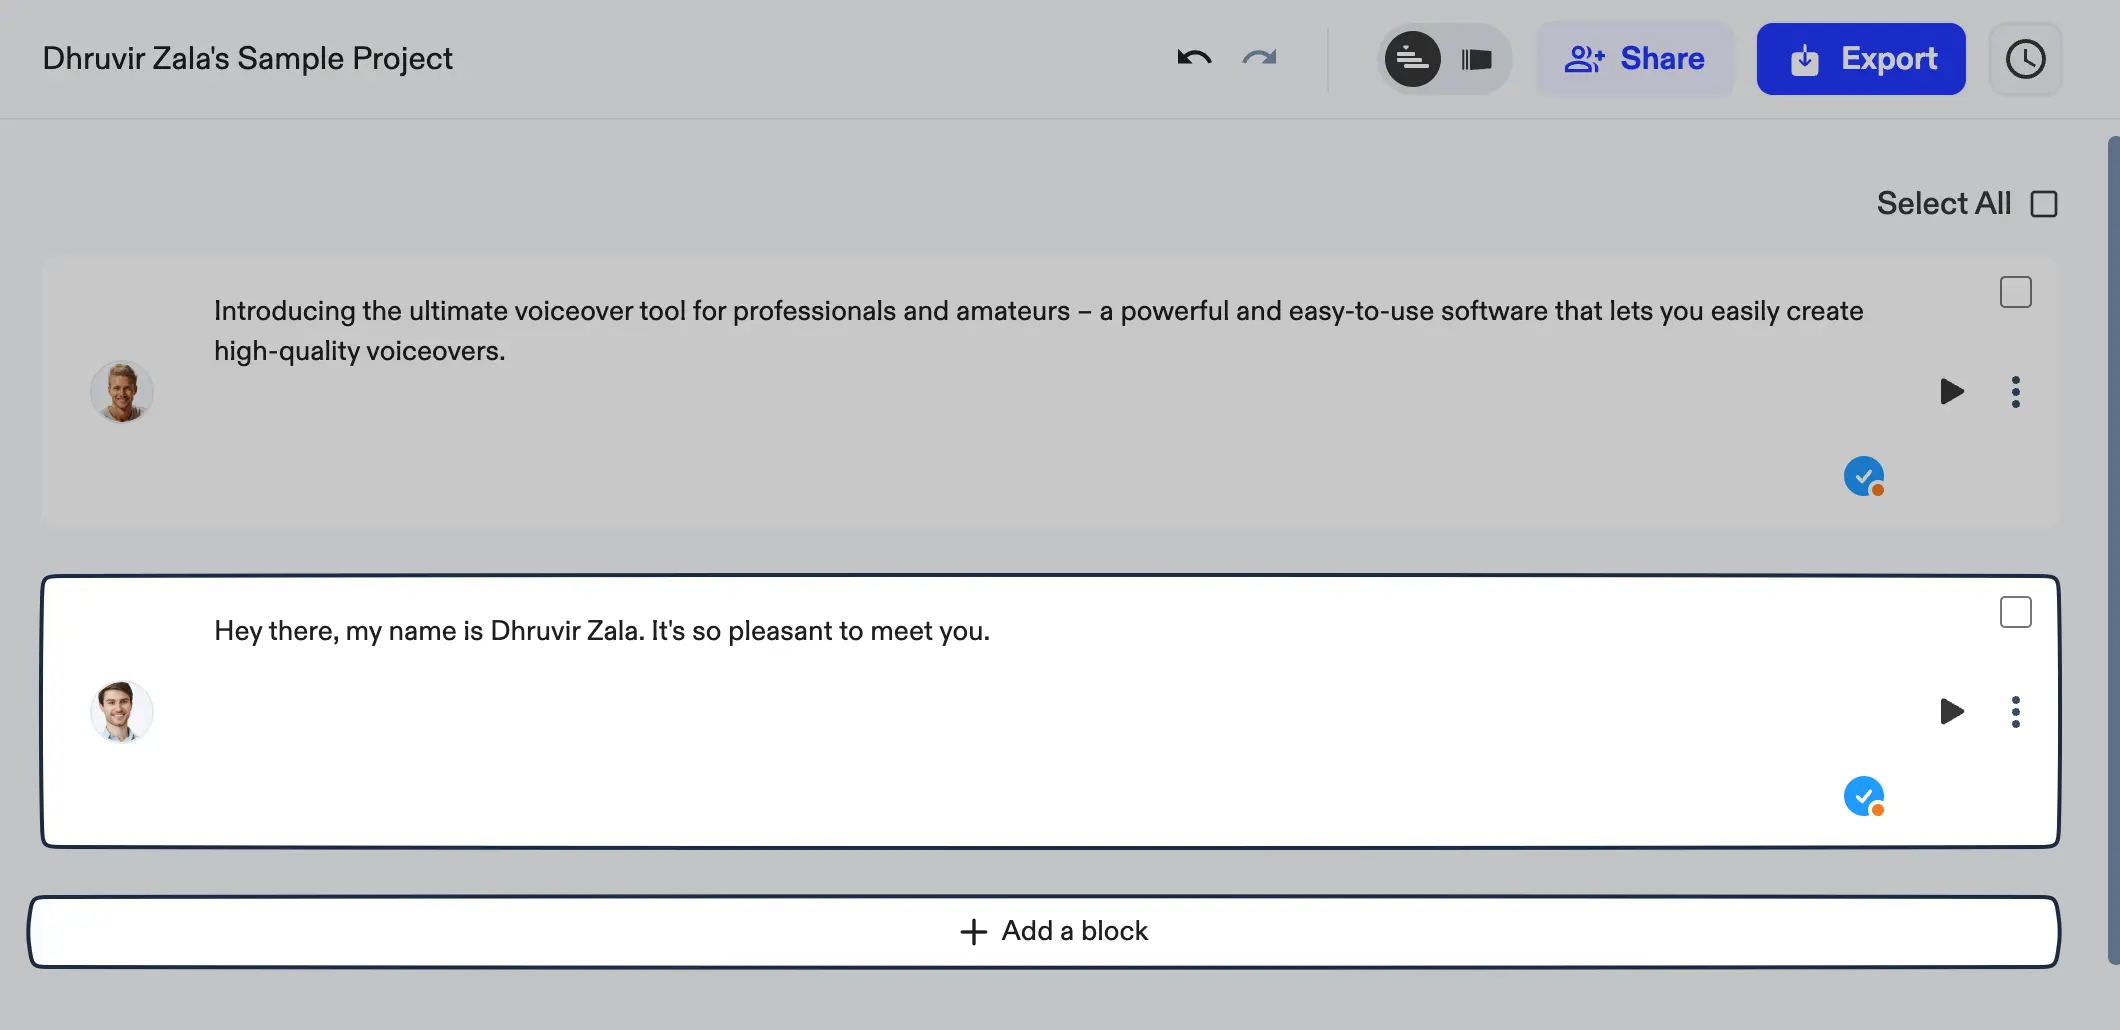
The best part?
Each text block is independent of each other. This means you can control the voice, speed, pitch, volume, pronunciation, and pauses for each block.
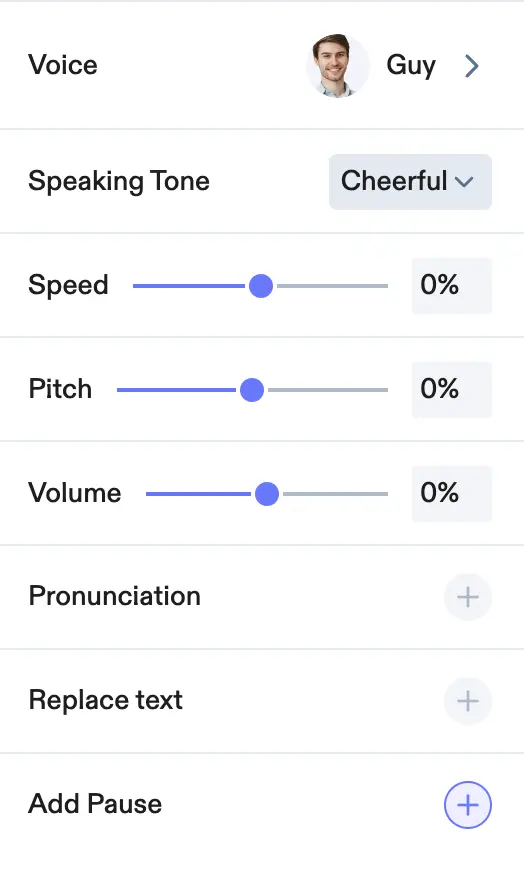
Some characters, not all, will also allow you to select the speaking tone. An AI voice called 'Guy' who speaks American English, for example, has many speaking tones to choose from:
Some other cool features include the ability to add pauses when needed, add pronunciation to words that are difficult to speak (like a name), and adjust the speed, pitch, and volume.
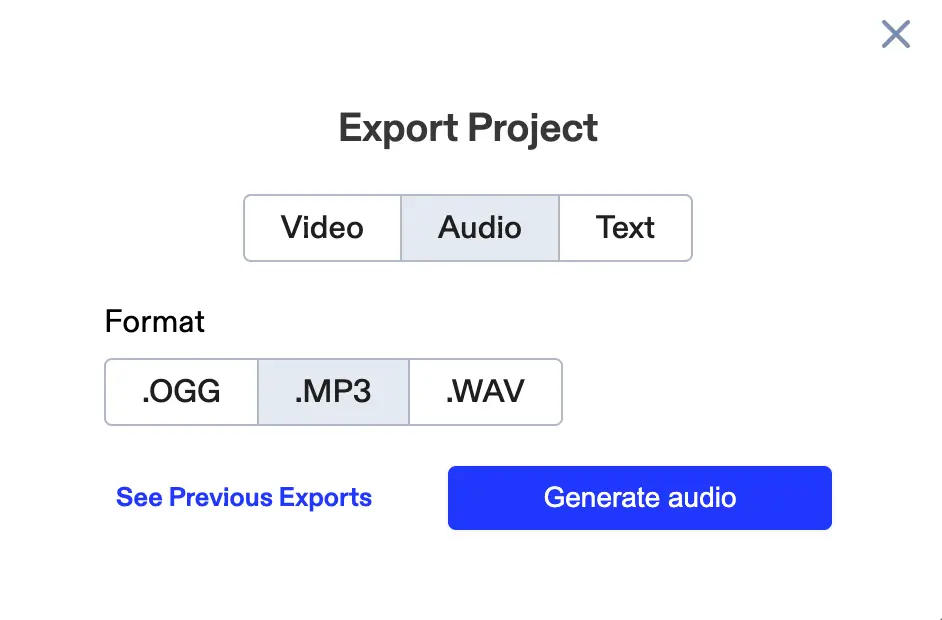
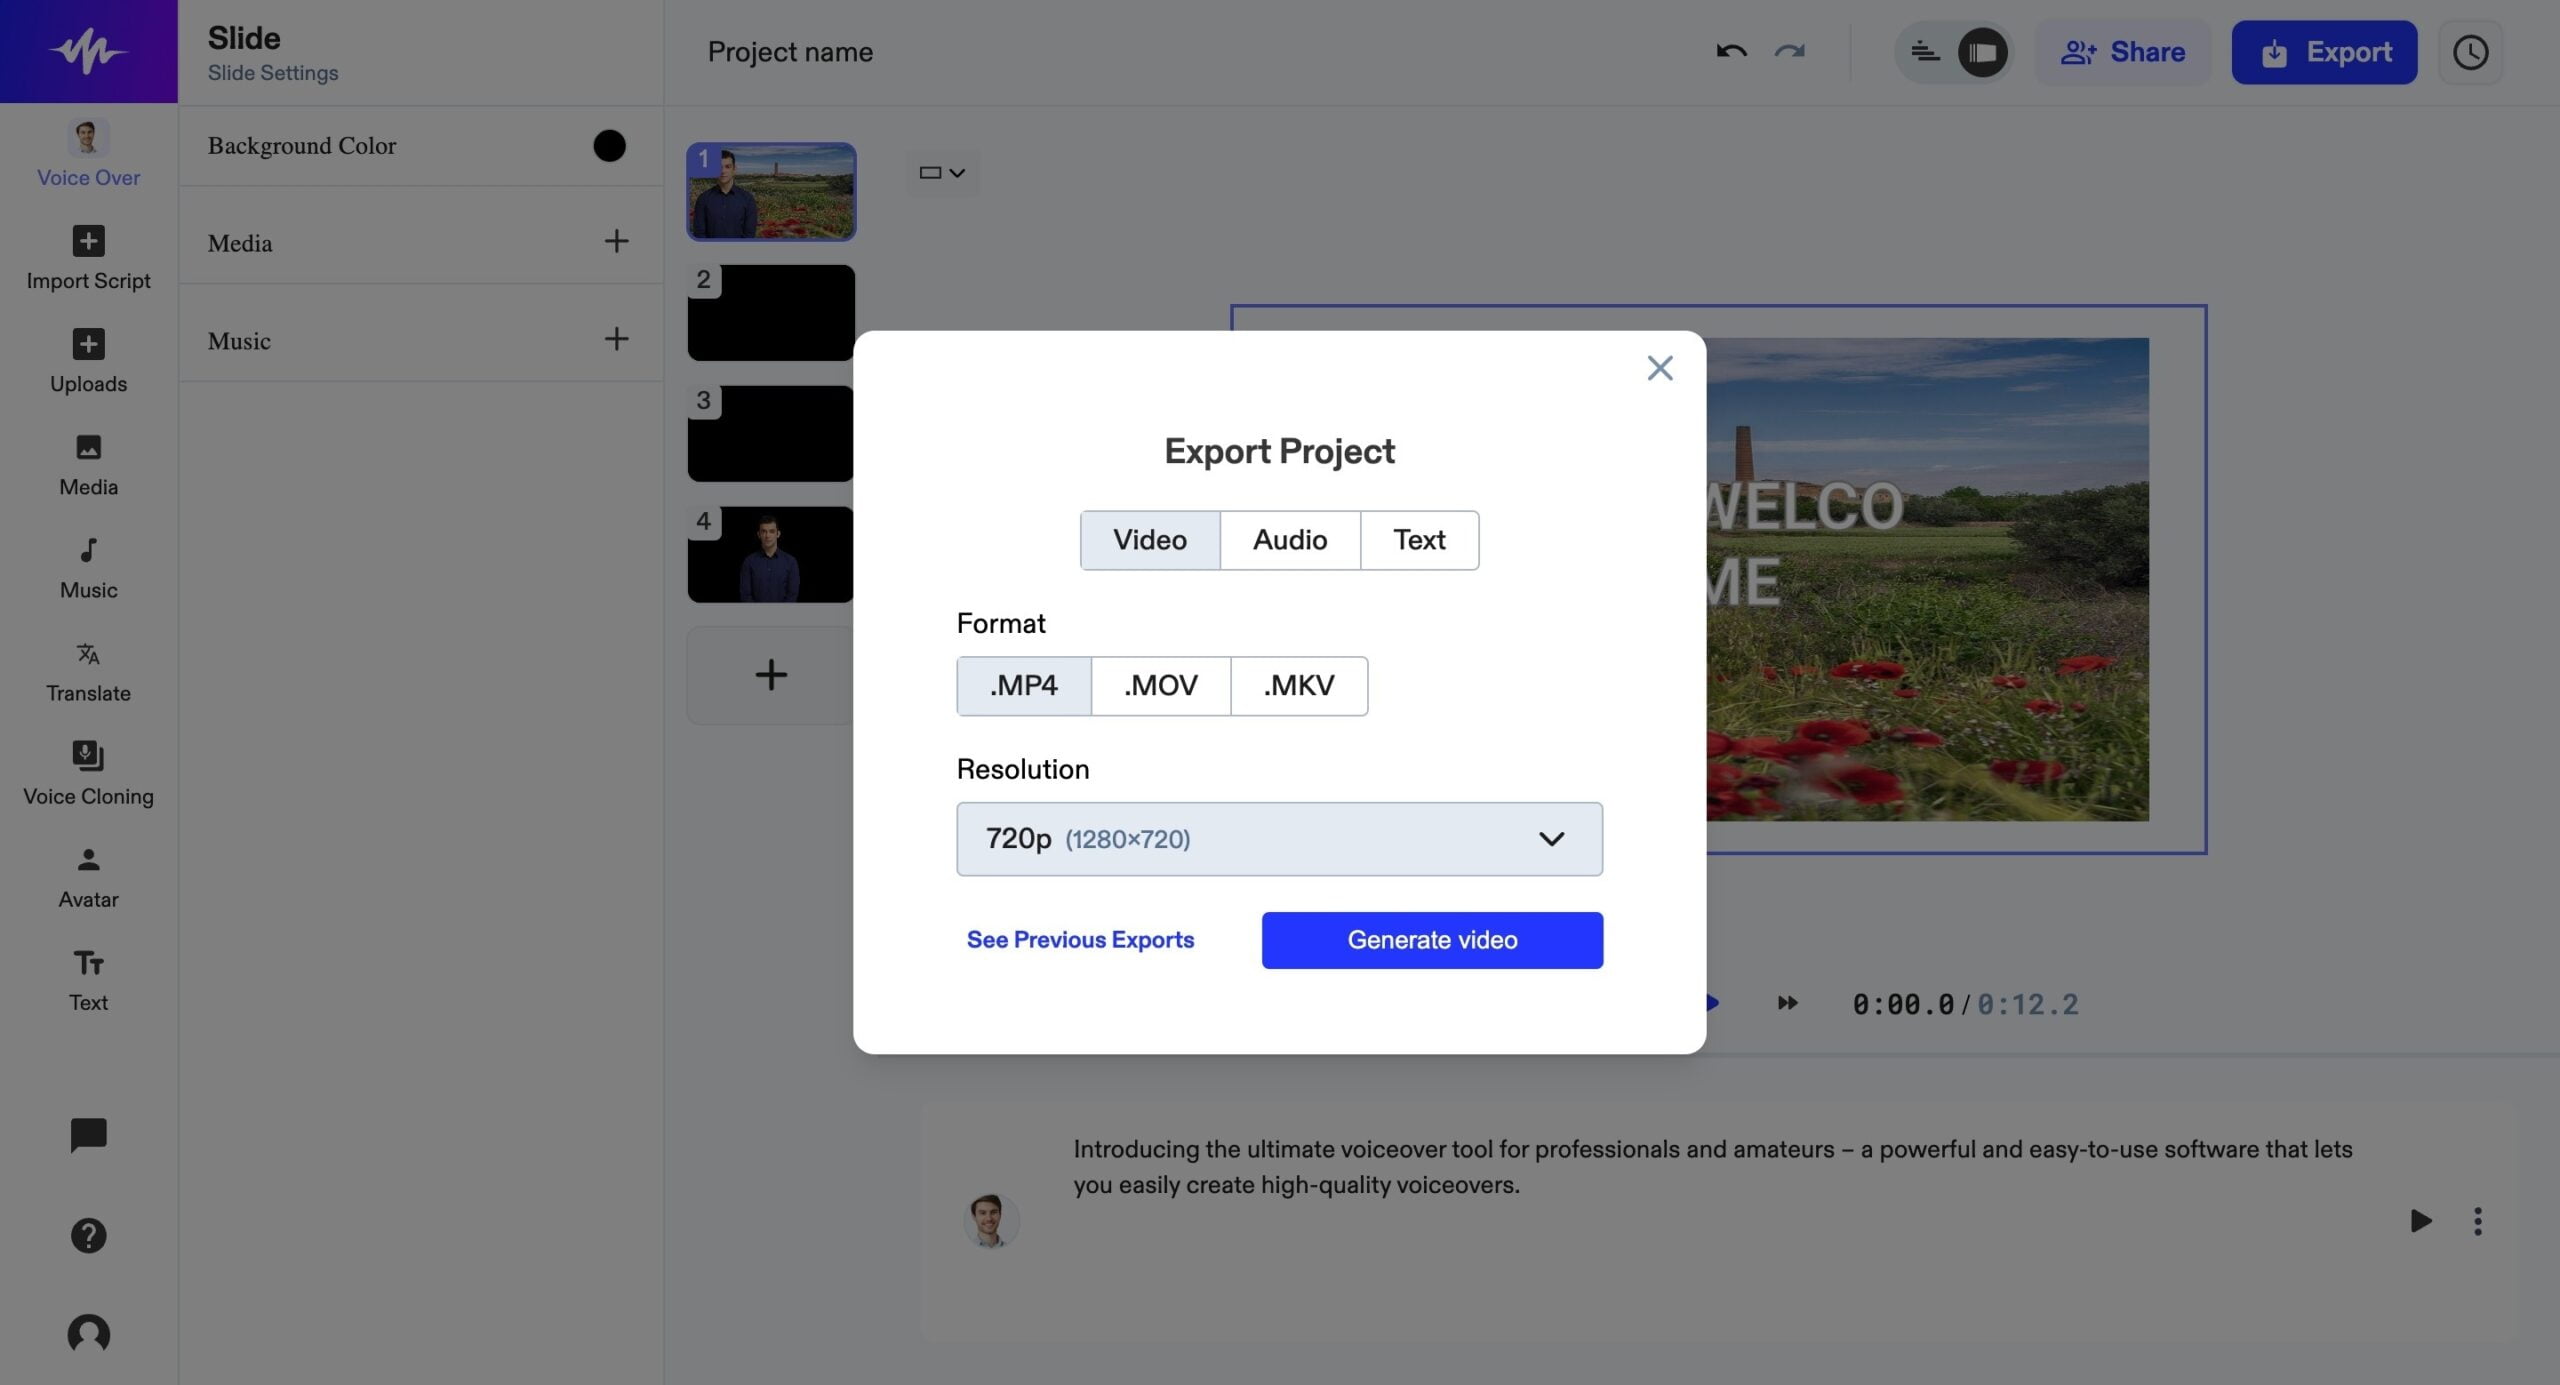
If you want to export your voice(s), click on the export button in the top right corner.
You can download your voice in either of the formats:
If you're working with someone else, simply click on the share button:
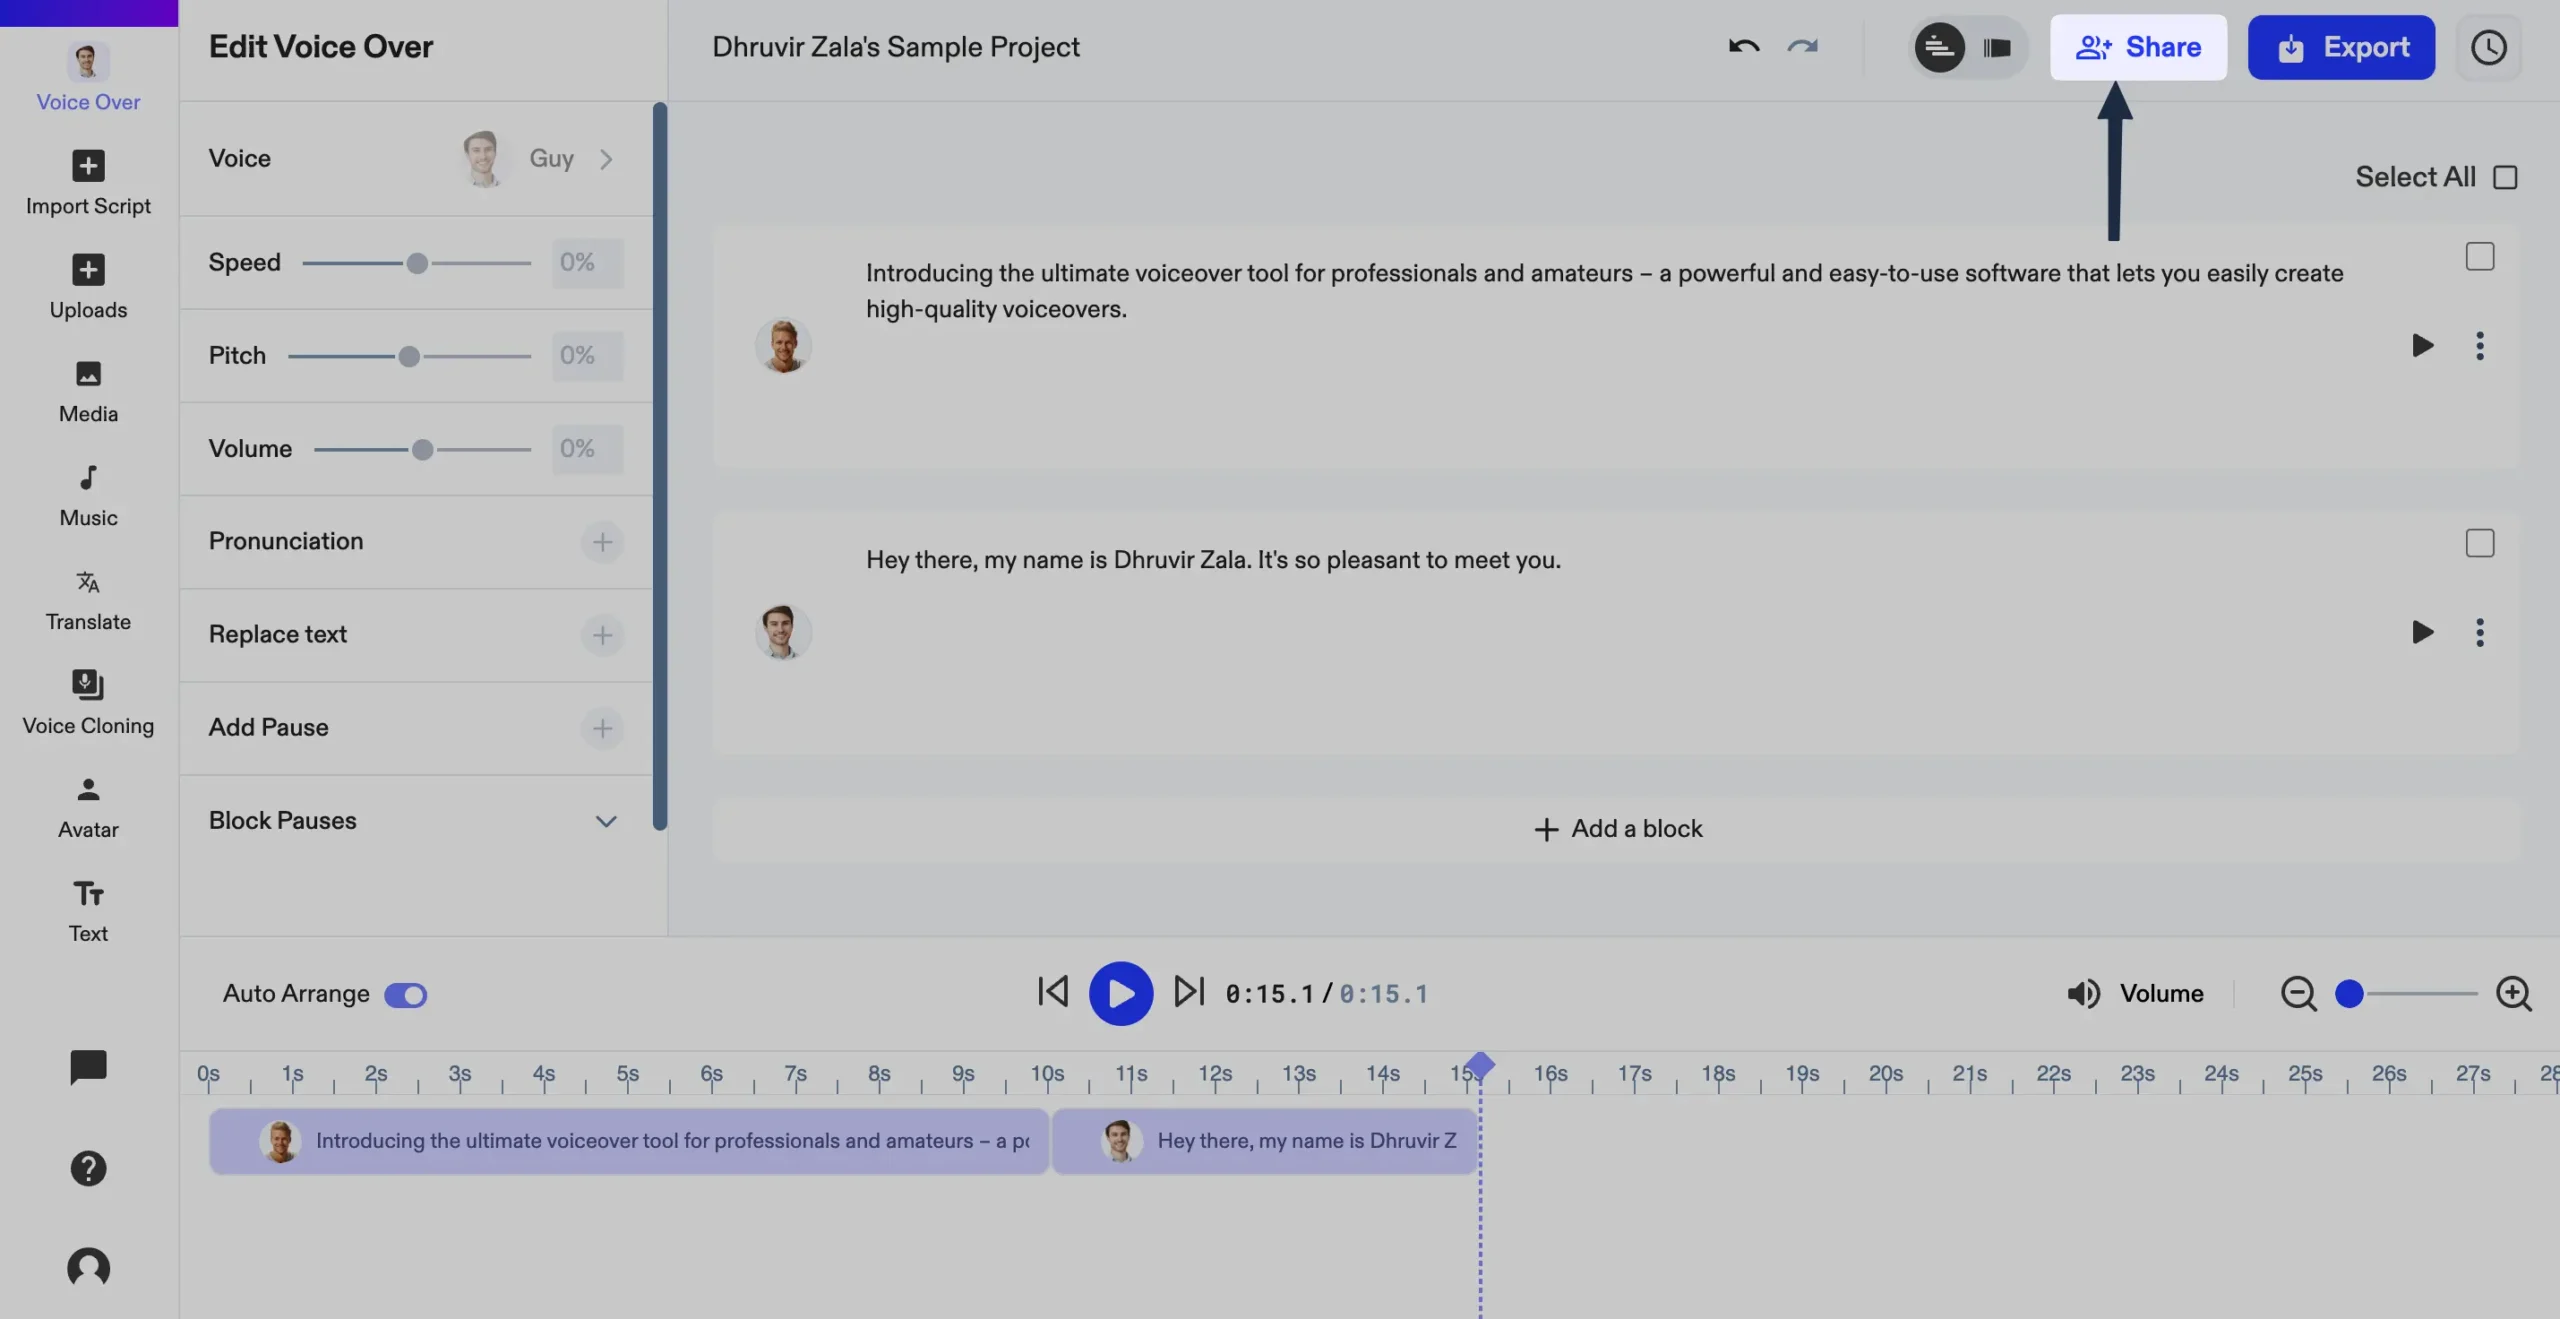
A link will be created. Share that link with your teammate. Once he/she creates an account, you'll be able to collaborate on the project effortlessly.
One more thing: the timeline at the bottom.

This is where you will be able to view all your generated voices.
The timeline is very basic. You don't get a lot of features (like transitions, trim, etc.) that you usually get in a full-fledged video editor like Camtasia.
All you can do with Speechify's timeline is:
However, I must say that while I didn't test out all the voices, the English voices sound pretty real, especially the ones with different speaking tones.
They've got personality and emotion.
What's great is the time and money you save. No need to pay human voice artists or wait around for recordings.
2. AI Avatar
As of writing this, Speechify Studio has over 65 AI avatars.
To access them, head over to the editor and click on Avatar from the left sidebar.
NOTE: Avatars are still in the beta phase.
Double-click on any avatar. Once you do that, it will be selected and appear on the slide.
If you click single-click on the avatar, you will be able to manage the settings related to that avatar.
It includes avatar style, avatar position, height & width, etc.
You can even adjust the size and position of your avatar using your cursor.
Beneath the avatar slide, there is a text container. The text you write here will be spoken by the avatar.
One thing to note here: the settings of the text container are similar to what we saw previously (in voice-overs).
IMPORTANT: Although you'll see some avatar animation and lip-syncing when you hit play, the accurate details will be displayed only after you export the file.
AI avatar is a useful feature for video creators, educators, marketers, business professionals, and anyone else who wants to create either informative, educational, entertaining, or persuasive videos.
One downside of AI avatar I experienced is the amount of time it will take to make your file ready for export, especially if there is a lot of text content to cover.
Software created just for this purpose (Like Synthesia and Soul Machines) is efficient in this capability.
3. AI Video
If you mix the above two features (voiceovers and AI avatars), what you get is a full-fledged AI video.
You heard me.
With the ability to make an avatar speak anything, all there's left to do is add some music and fill the slides with beautiful media to turn it into a video.
Here's how to do that:
Once you are in the editor, assuming you have selected your avatar(s) and are done with script writing, head over to your slides.
PRO TIP: Clicking on these buttons (as shown below) allows you to change layout views. Choose whatever seems to work well for you.
When you click on the slide, slide settings appear on its left.
You can:
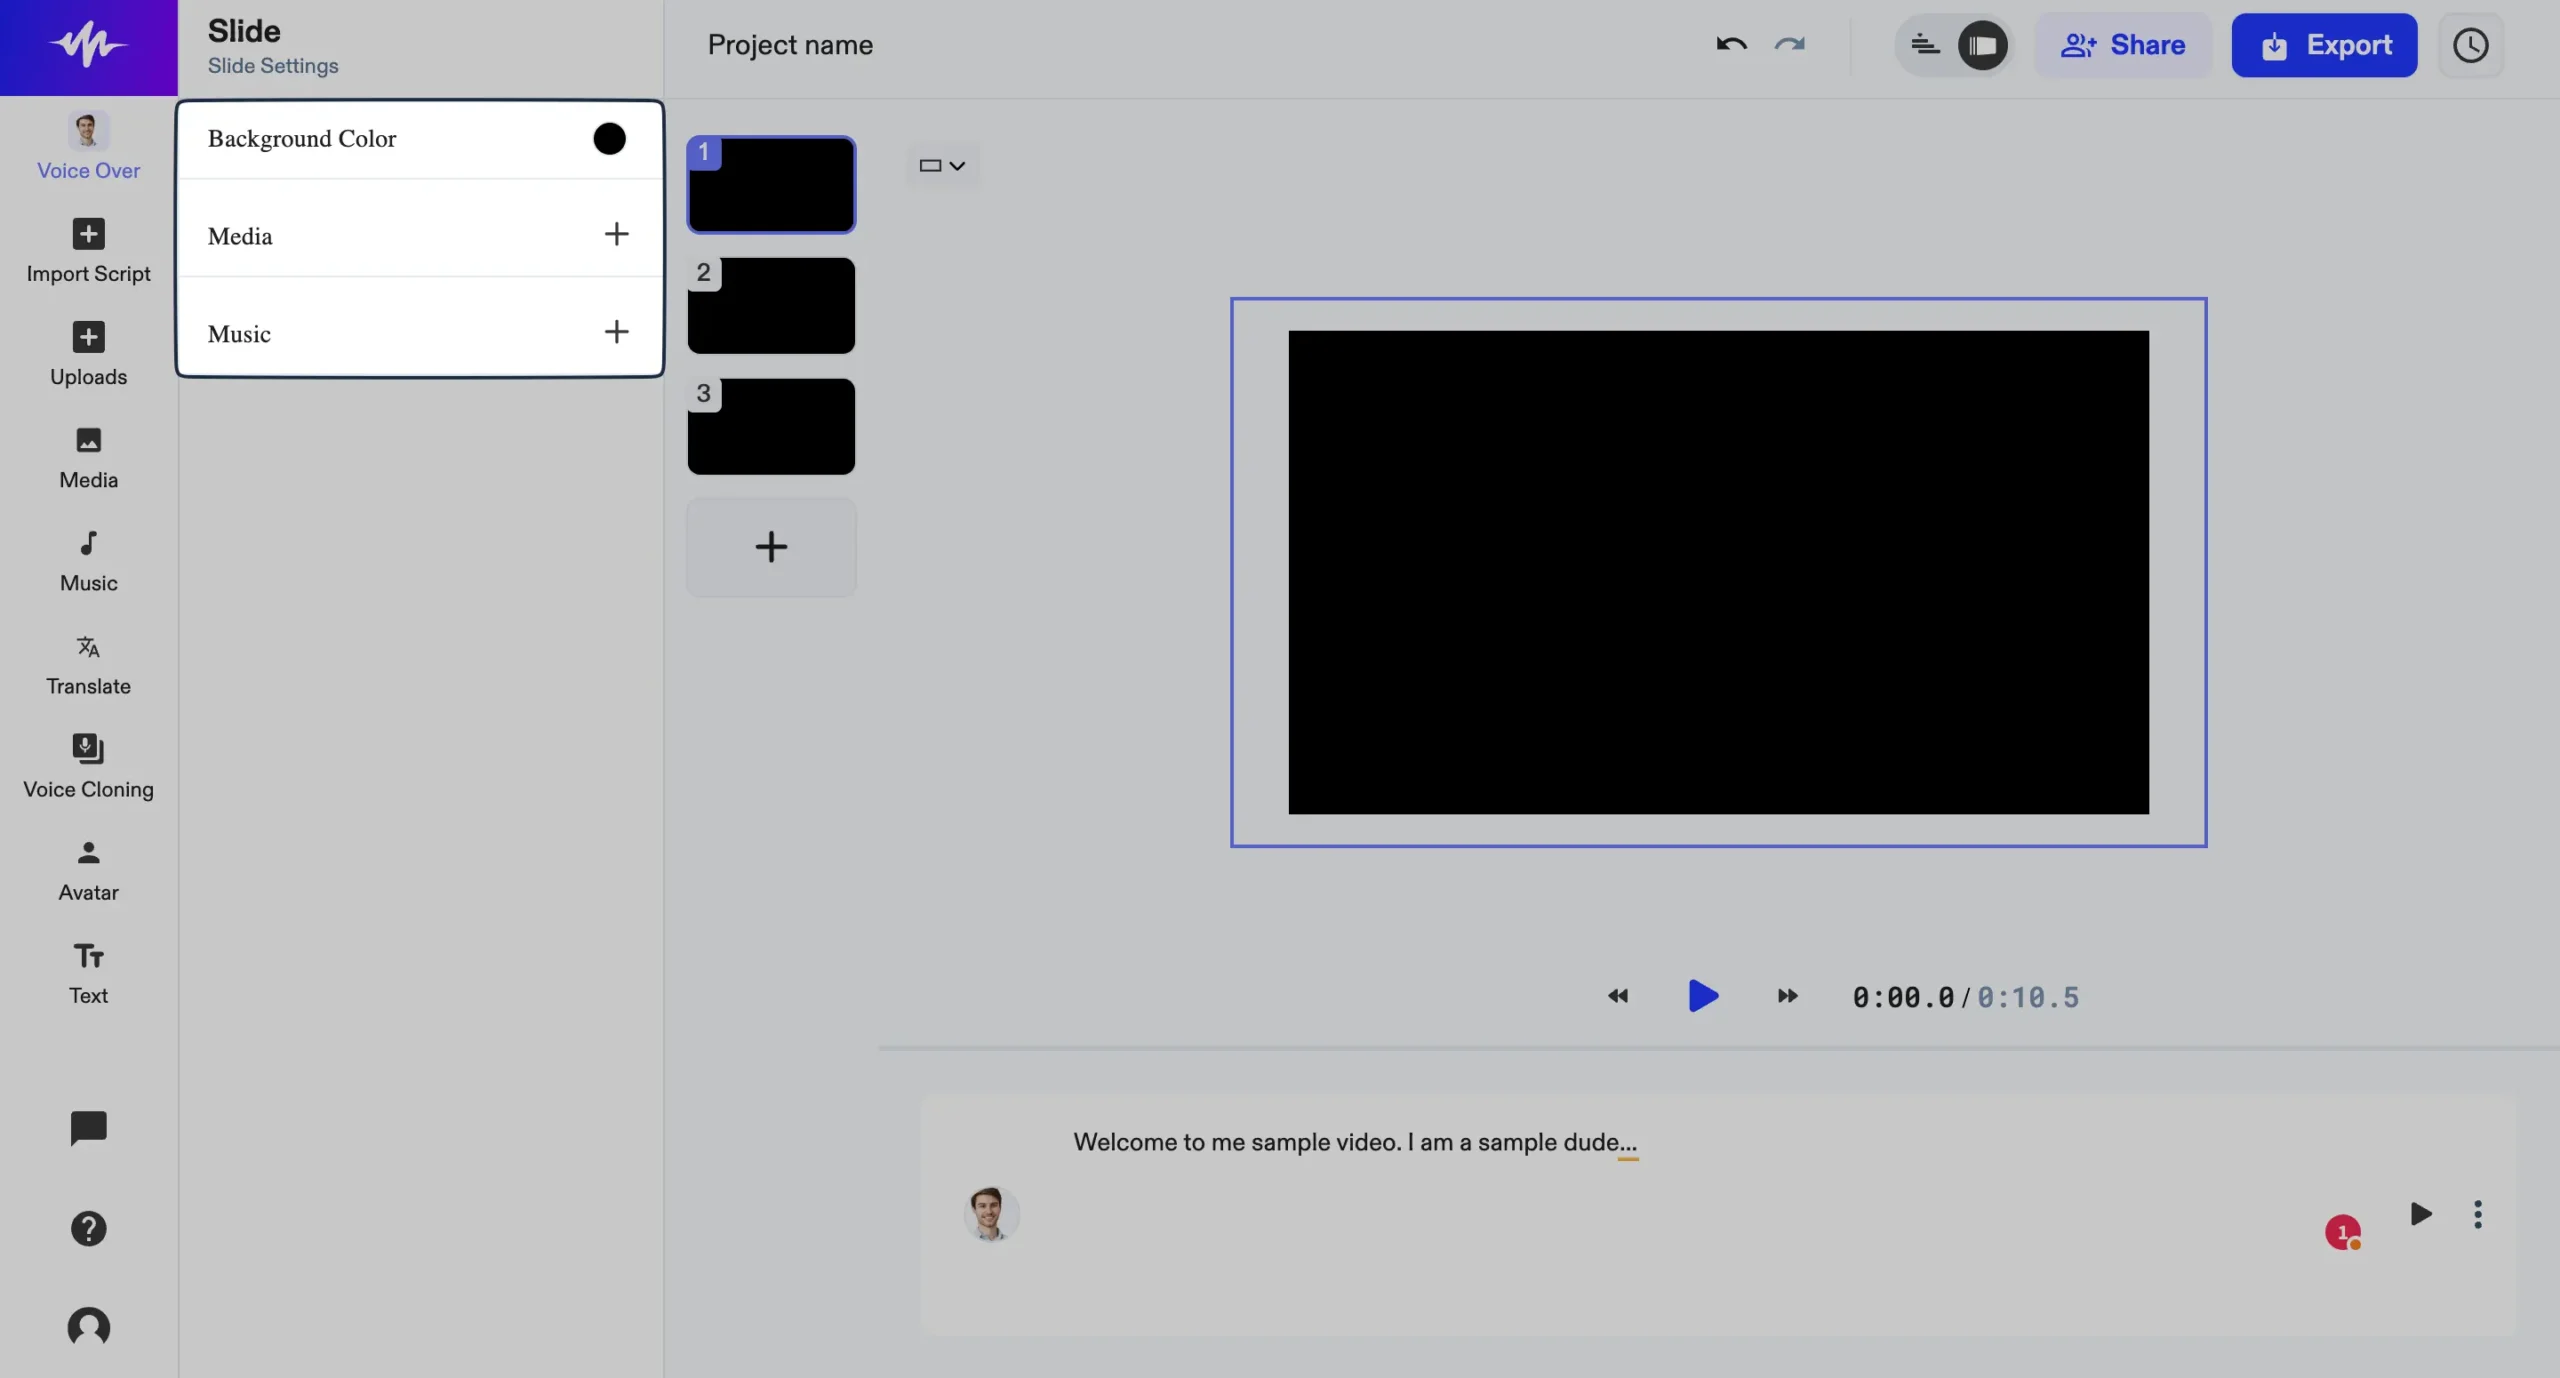
Speechify has a lot of copyright-free music and media to choose from, with the ability to upload your own:
On the slight right of the slides, you'll see this resolution icon.
It lets you select an appropriate size for your video (even a custom size).
Oh, and you can even add text to your slides.
Finally, your videos can be exported with up to 4k quality and in .MP4, .MOV, and .MKV video format extensions.
That's all you require to create a sharable AI video inside Speechify Studio.
And it's easy to do.
4. AI Transcription
Speechify Studio lets you transcribe any video or audio file into text automatically using AI technology.
Couldn't be simpler - just upload your video, hit "Transcribe", and boom - the AI does all the work and spits out a text transcript for you.
The cool thing is, that it supports a ton of different languages. So whether your video is in English, Spanish, French, or whatever - it can handle it.
And from what I've seen, the accuracy is damn good too.
This feature is useful with a bunch of solid use cases:
Basically, it just opens up a lot of doors for working with your video content in new ways.
The best part?
It doesn't even have to be "your" video.
If you don't have an MP3/MP4 file stored locally, you can paste a link to any YouTube video.
You can then manually enter the number of speakers speaking in the video or let Speechify autodetect it.
Finally, select the language of the YouTube video.
Once you do that, you can choose to remove the filler words from the content and then click on the submit button.
Your transcription process will begin. Depending on the length of the YouTube video and your internet speed, it may take some time.
I uploaded a 9-minute YouTube video which took about a minute to get processed.
A new project will be created on your dashboard page.
Once the processing is done, click on the project to access your transcribed text.
Click on the three dots beside any text block and you'll get an option to rewrite the content using AI.
It's really quick to give answers. If you like the text generated by AI, click replace selection to replace the text in seconds or you can try again.
Handy feature.
Finally, you get many export options. You can export both the subtitles and the audio.
For subtitles, the following formats are supported:
And for audio, you have:
One thing I wish Speechify had was a feature that apps like Descript have.
Whenever I delete any specific word/phrase from the text container, it should automatically be deleted from the video.
Speechify Transcription does not have that feature yet.
But it does a fine job of quickly transcribing and editing text from videos.
5. AI Dubbing
Speechify Studio's AI dubbing feature allows you to automatically dub your existing videos into multiple languages using artificial intelligence.
Here's how it works:
Step 1: You upload your video script or transcription into Speechify Studio.
Step 2: The AI translates the text into whatever target languages you want, like Spanish, Hindi, French, etc. Speechify supports over 20 languages.
Step 3: Then, Speechify's advanced text-to-speech AI generates natural-sounding voices in those languages to dub over the original audio.
Step 4: Boom! Your video is now dubbed into multiple languages, instantly making it accessible to way more viewers globally.
The process is all similar to transcription. You can either upload your media file(s), or a YouTube video link.
Once the project is created, you will get an option to translate the video into another language with any of the Speechify voices.
For example, I want to convert one of my English videos into Hindi language.
This is how I will do it:
Again, it took less than a minute to translate a 9-minute YouTube video into Hindi.
And damn, I am impressed. For someone who understands and speaks Hindi a lot, I can confidently say that Speechify kills it when it comes to dubbing.
Moreover, rewriting the text in your text block using AI is not limited to the English language. You can ask Speechify to rewrite the content of other languages as well.
This has some much potential. You can take one of your videos, create multiple versions of it (in different languages), and reach a global audience.
The AI voices are impressively realistic and capture different emotions/tones based on the context.
So your dubbed Spanish video won't just be a robotic translation - it'll have the same passion and engagement as the original.
Whether it's marketing videos, documentaries, training content, or pretty much anything, AI dubbing makes localization simple.
6. AI Voice Cloning
Voice cloning, in simple terms, is using AI to create a replica of someone's voice.
It analyzes audio samples of the person's voice and can then generate brand new speech that sounds just like them.
Speechify Studio lets you clone your voice within 30 seconds by just speaking into your laptop.
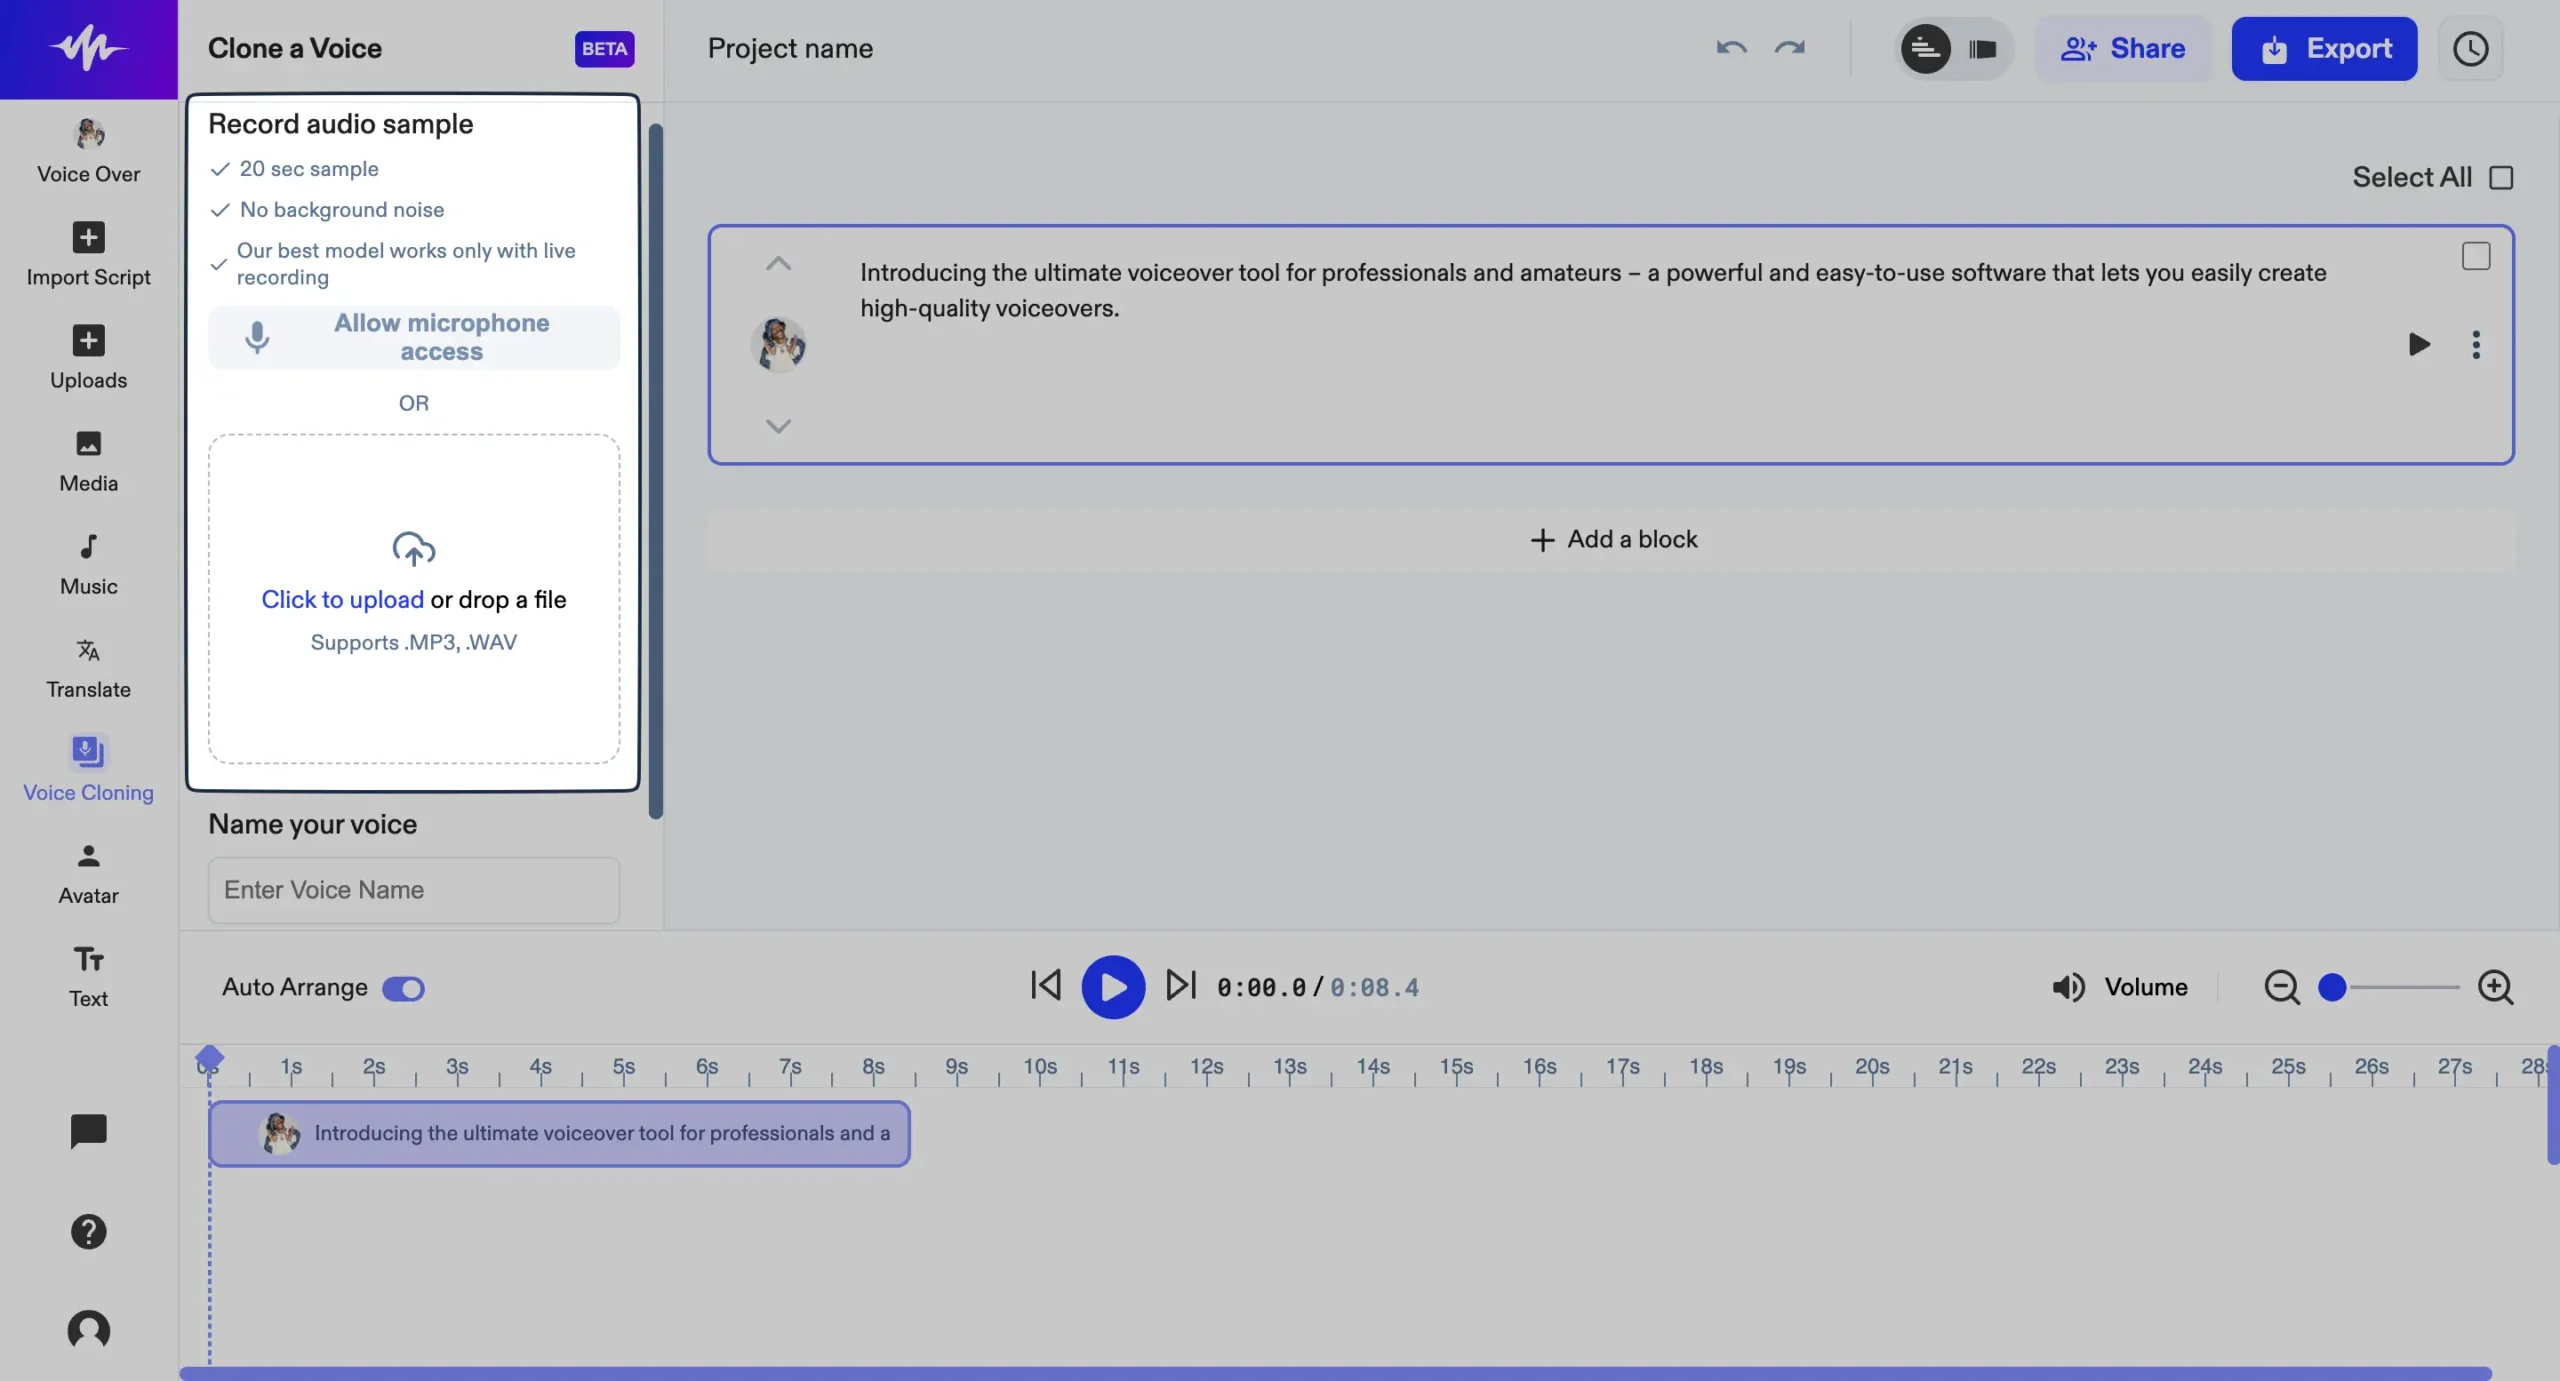
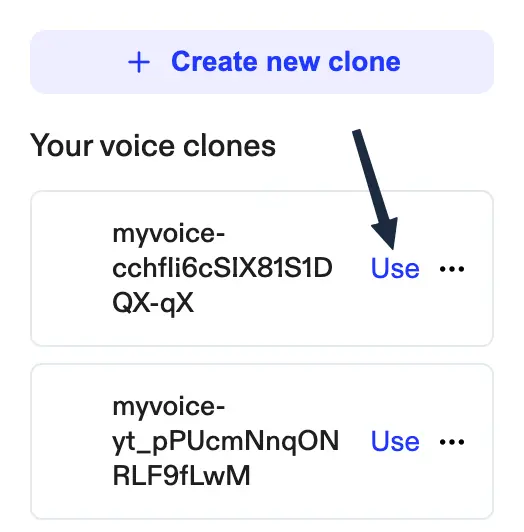
Head over to Voice Cloning and click Create New Clone.
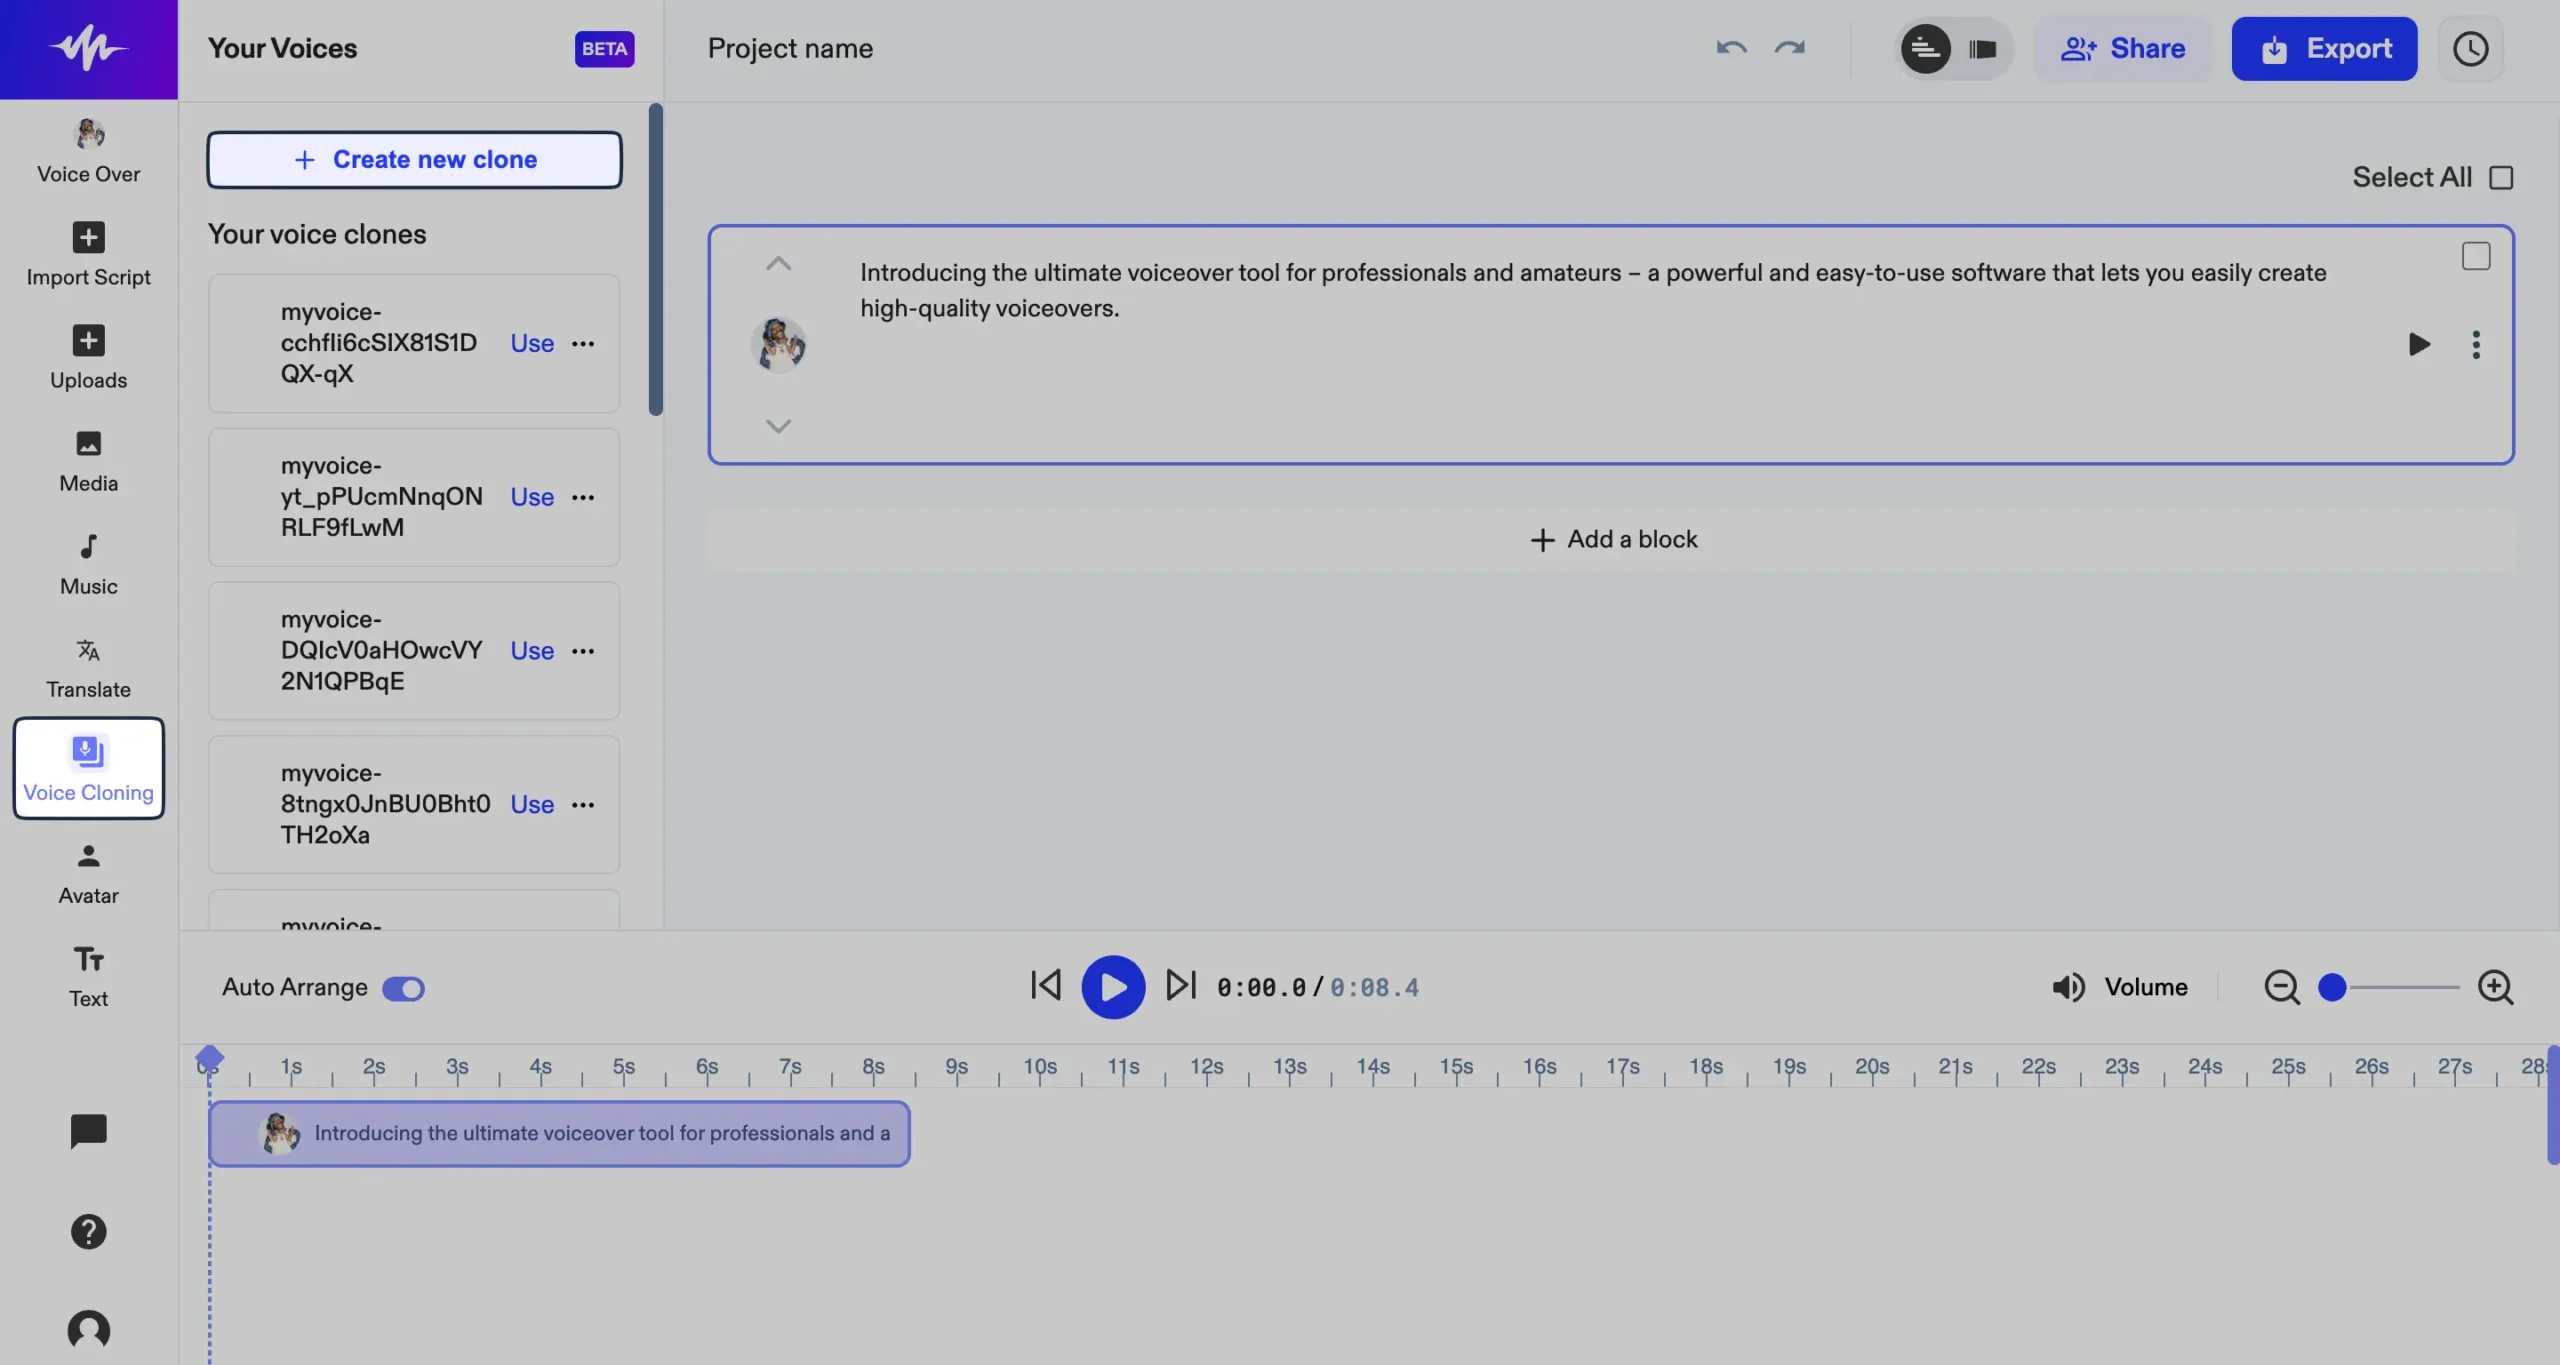
You will be asked to either upload your audio file or record a 20-second audio sample in a quiet place. The latter is recommended.
Once you are done, click Create Clone. Once it is ready you can input any text and listen to that text with your cloned voice. And even download it.
It's crazy useful for things like:
The cloning is shockingly accurate at capturing all the nuances and style of your real voice. You can even add different emotions and tweak the pronunciation if needed.
Of course, the big concern with this tech is the potential for misuse like voice deepfakes and impersonation scams.
But if we're talking about cloned quality, it's phenomenal.
By now, you've mastered all the features of Speechify Studio. This should put you in a good position to decide whether Speechify Studio is for you or not.
Finally, let's discuss Speechify Studio's pricing.
7. AI Text-to-Video
If you're like me: lazy and lazier, then this feature might be your friend.
Basically, it lets you enter your script by either uploading a text file (.txt or .docx) or by manually writing your script in the container.
You will then be asked to recheck the script, this time neatly organized. You can also highlight or un-highlight any word you want to.
I don't know for sure but I believe highlighting important words will help AI create appropriate visuals for the video.
Within a few seconds, you get a video with AI-generated customizable voice and automatically generated video.
Now if you've seen the sample AI text-to-videos generated by OpenAI's Sora, anything else you will see may look subpar.
But hey, while all the video visuals are not super relevant, they still work for the first draft.
For instance, regarding the above example, Vimeo was mentioned in the script and I even highlighted it.
Speechify somehow got the original logo of Vimeo and used it inside the video.
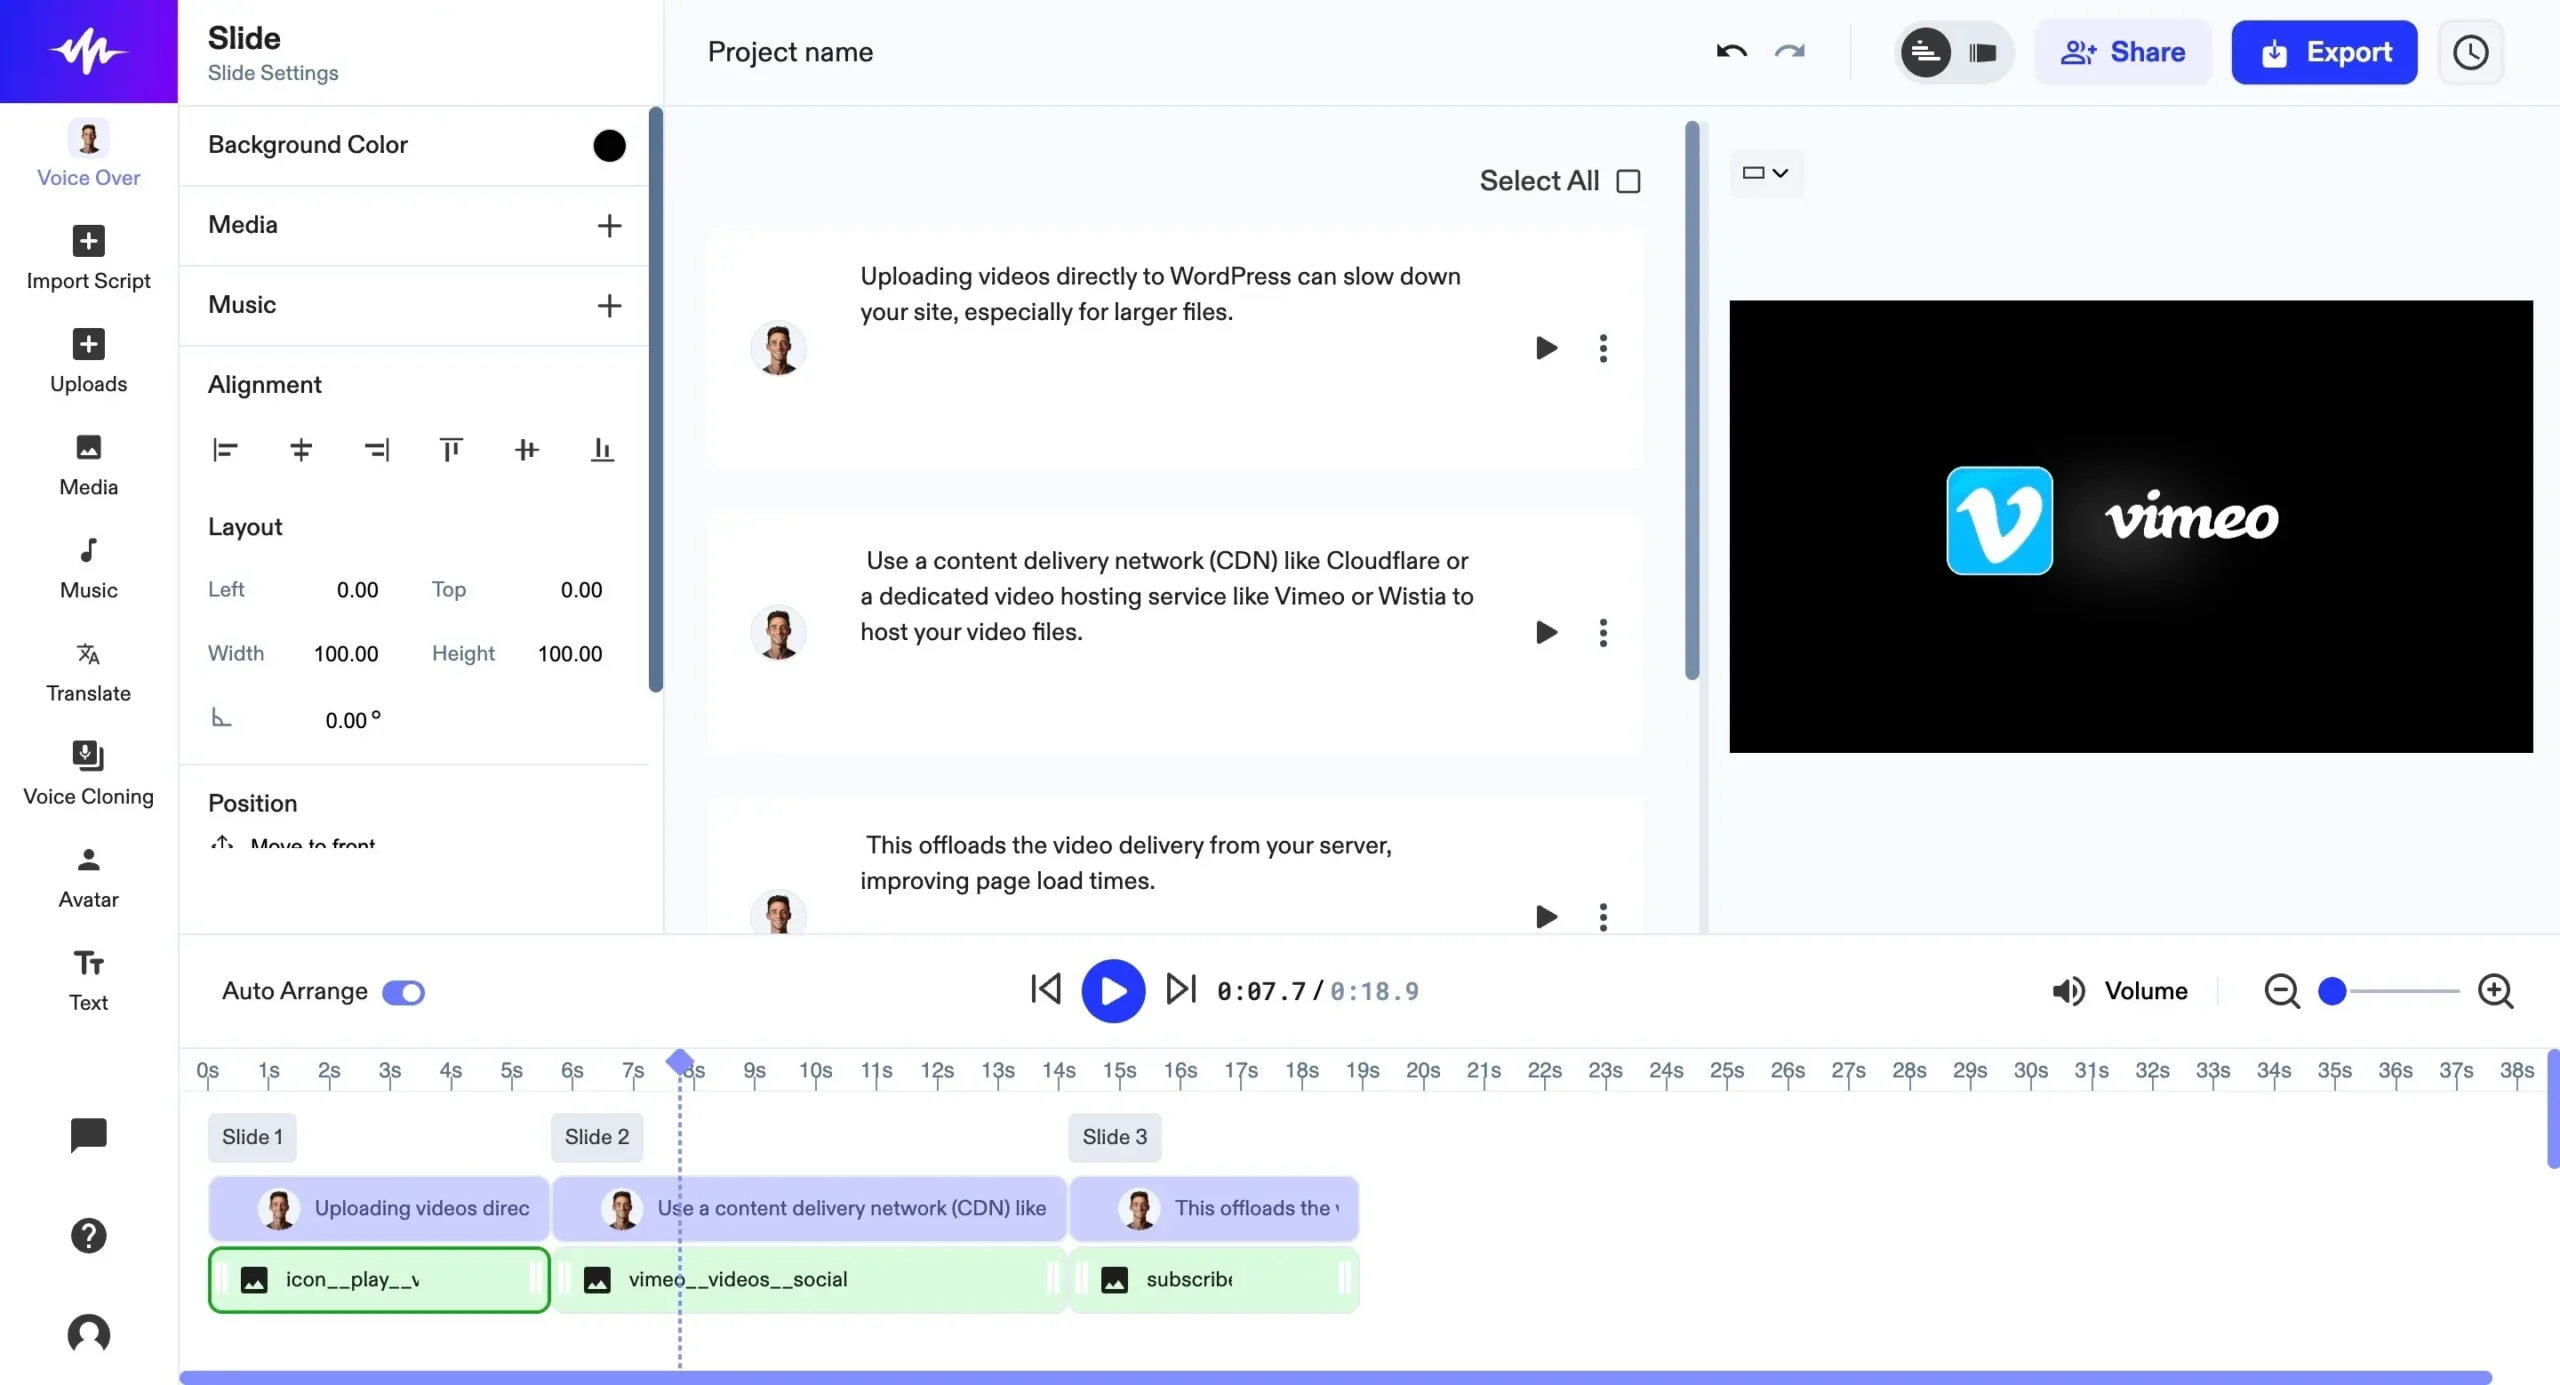
Not bad.
Right now, Speechify's AI text-to-video functionality only allows you to write a script of up to 5000 characters (up to 1000 words). Maybe that can be increased for heavy users.
Speechify Studio Price and Plans
They've got four main plans: Free, Basic, Professional, and Enterprise.
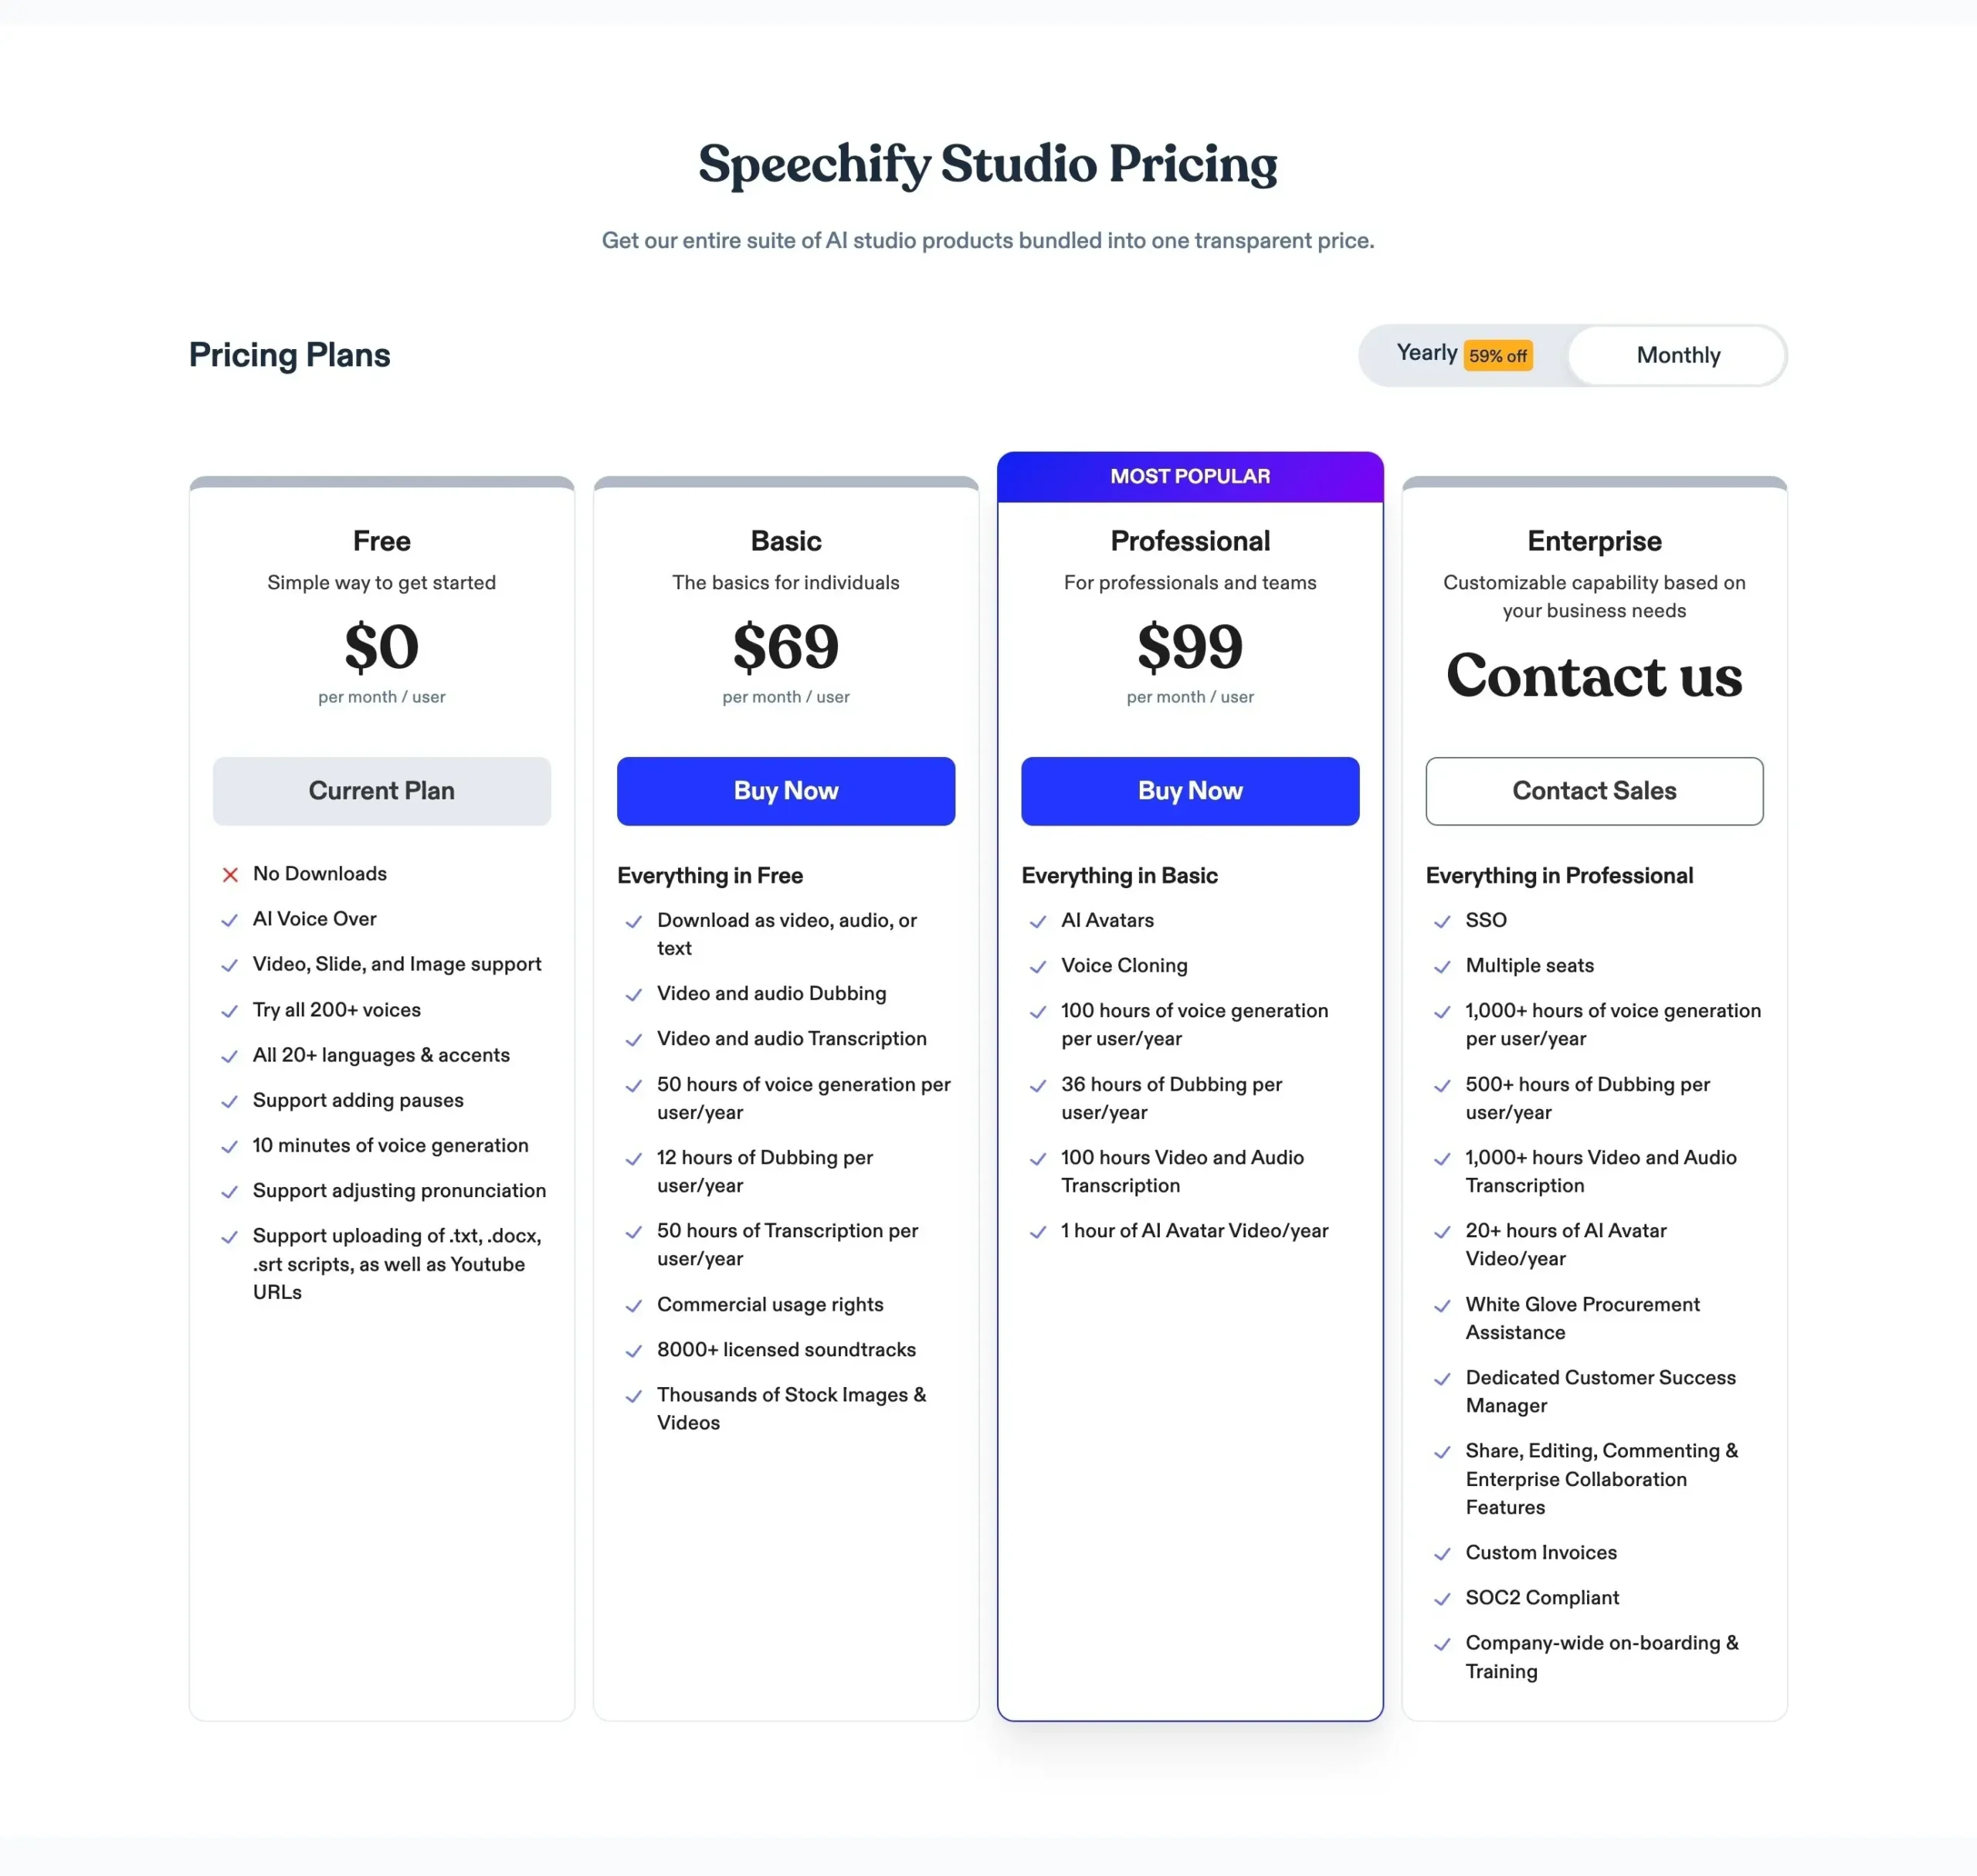
The Free plan is exactly what it sounds like - you get 10 minutes of voice generation per month and basic features, at zero cost. You cannot export anything in the free plan.
The Basic plan costs $69 per month ($24/month on annual billing) and gets you 50 hours of voice generation, 12 hours of dubbing, 50 hours of transcription, and commercial usage rights.
Now, their most popular plan is the Professional at $99 ($32.08/month on annual billing) per month.
With this, you get 100 hours of voice generation, 36 hours of dubbing, and 100 hours of transcription, plus cool stuff like AI avatars and voice cloning.
If you're a real big dog, the Enterprise plan has custom pricing based on your needs. We're talking 1000+ hours of voice generation, 500+ hours of dubbing, 1000+ hours of transcription, 20+ hours of AI avatar video per year, etc.
Depending on the features you need the most, you can choose a plan for yourself. Or get started for free and take it from there.
Should You Get Speechify Studio? Here's My Two Cents
The natural-sounding AI voices, smooth lip-syncing avatars, and efficient multilingual support make Studio promising for:
That said, it's not flawless.
While the voice quality and accents impressed me, the avatar animations still feel slightly robotic and unpolished at times.
And certain workflows like transcribing and editing video text have further room for improvement.
So should you get Speechify Studio?
If you regularly create video content, tutorials, presentations, podcasts, or any form of audio/voice-based media - I'd say hell yeah.
The time and cost savings alone make it worthwhile.
However, if you're an occasional player with basic needs, the free will suffice.
DISCLOSURE: Some links in this blog post may be affiliate links. This means that if you make a purchase or sign up for a service through these links, I may earn a small commission. However, I want to assure you that this does not affect the price you pay. I only recommend products and services that I genuinely believe in. Learn more.

Article by
Dhruvir Zala
I started this blog to provide brutally honest reviews of useful Generative AI tools and business productivity software. My objective is to help individuals and businesses choose exceptional products.